Pages

Showing posts with label with. Show all posts

Sunday, May 8, 2016

Android Studio AVD Manager now support Nexus 6P 5X profile

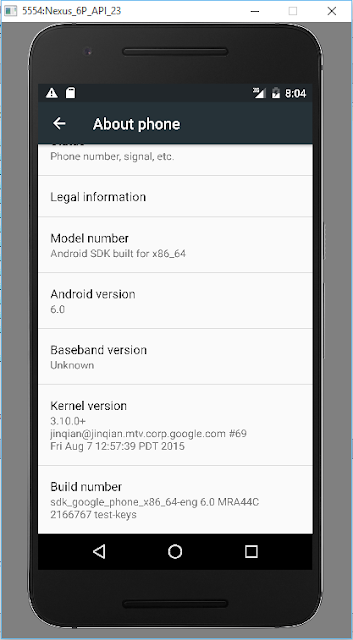
Android Studio AVD Manager now support Nexus 6P/5X profile, you can create AVD (Android Virtual Device) running Android 6, Marshmallow, API 23.


Create AVD of Nexus 6P running Android 6 Marshmallow

Read More..

Thursday, May 5, 2016

Android Chat example with server sending individual message to specify client


Refer to my old post of Simple Android Chat Application, server side, and client side. Function to send sending individual message to specify client is added in server side.


uses-permission of "android.permission.INTERNET" is needed in AndroidManifest.xml, for both server and client.


Server side:

MainActivity.java
package com.blogspot.android_er.androidchatserver;

import android.os.Bundle;
import android.support.v7.app.AppCompatActivity;
import android.view.View;
import android.widget.ArrayAdapter;
import android.widget.Button;
import android.widget.Spinner;
import android.widget.TextView;
import android.widget.Toast;

import java.io.DataInputStream;
import java.io.DataOutputStream;
import java.io.IOException;
import java.net.InetAddress;
import java.net.NetworkInterface;
import java.net.ServerSocket;
import java.net.Socket;
import java.net.SocketException;
import java.util.ArrayList;
import java.util.Enumeration;
import java.util.List;

public class MainActivity extends AppCompatActivity {

static final int SocketServerPORT = 8080;

TextView infoIp, infoPort, chatMsg;
Spinner spUsers;
ArrayAdapter<ChatClient> spUsersAdapter;
Button btnSentTo;

String msgLog = "";

List<ChatClient> userList;

ServerSocket serverSocket;

@Override
protected void onCreate(Bundle savedInstanceState) {
super.onCreate(savedInstanceState);
setContentView(R.layout.activity_main);
infoIp = (TextView) findViewById(R.id.infoip);
infoPort = (TextView) findViewById(R.id.infoport);
chatMsg = (TextView) findViewById(R.id.chatmsg);

spUsers = (Spinner) findViewById(R.id.spusers);
userList = new ArrayList<ChatClient>();
spUsersAdapter = new ArrayAdapter<ChatClient>(
MainActivity.this, android.R.layout.simple_spinner_item, userList);
spUsersAdapter.setDropDownViewResource(android.R.layout.simple_spinner_dropdown_item);
spUsers.setAdapter(spUsersAdapter);

btnSentTo = (Button)findViewById(R.id.sentto);
btnSentTo.setOnClickListener(btnSentToOnClickListener);

infoIp.setText(getIpAddress());

ChatServerThread chatServerThread = new ChatServerThread();
chatServerThread.start();
}

View.OnClickListener btnSentToOnClickListener = new View.OnClickListener() {
@Override
public void onClick(View v) {
ChatClient client = (ChatClient)spUsers.getSelectedItem();
if(client != null){
String dummyMsg = "Dummy message from server. ";
client.chatThread.sendMsg(dummyMsg);
msgLog += "- Dummy message to " + client.name + " ";
chatMsg.setText(msgLog);

}else{
Toast.makeText(MainActivity.this, "No user connected", Toast.LENGTH_LONG).show();
}
}
};

@Override
protected void onDestroy() {
super.onDestroy();

if (serverSocket != null) {
try {
serverSocket.close();
} catch (IOException e) {
// TODO Auto-generated catch block
e.printStackTrace();
}
}
}

private class ChatServerThread extends Thread {

@Override
public void run() {
Socket socket = null;

try {
serverSocket = new ServerSocket(SocketServerPORT);
MainActivity.this.runOnUiThread(new Runnable() {

@Override
public void run() {
infoPort.setText("Im waiting here: "
+ serverSocket.getLocalPort());
}
});

while (true) {
socket = serverSocket.accept();
ChatClient client = new ChatClient();
userList.add(client);
ConnectThread connectThread = new ConnectThread(client, socket);
connectThread.start();

runOnUiThread(new Runnable() {
@Override
public void run() {
spUsersAdapter.notifyDataSetChanged();
}
});
}

} catch (IOException e) {
e.printStackTrace();
} finally {
if (socket != null) {
try {
socket.close();
} catch (IOException e) {
// TODO Auto-generated catch block
e.printStackTrace();
}
}
}

}

}

private class ConnectThread extends Thread {

Socket socket;
ChatClient connectClient;
String msgToSend = "";

ConnectThread(ChatClient client, Socket socket){
connectClient = client;
this.socket= socket;
client.socket = socket;
client.chatThread = this;
}

@Override
public void run() {
DataInputStream dataInputStream = null;
DataOutputStream dataOutputStream = null;

try {
dataInputStream = new DataInputStream(socket.getInputStream());
dataOutputStream = new DataOutputStream(socket.getOutputStream());

String n = dataInputStream.readUTF();

connectClient.name = n;

msgLog += connectClient.name + " connected@" +
connectClient.socket.getInetAddress() +
":" + connectClient.socket.getPort() + " ";
MainActivity.this.runOnUiThread(new Runnable() {

@Override
public void run() {
chatMsg.setText(msgLog);
}
});

dataOutputStream.writeUTF("Welcome " + n + " ");
dataOutputStream.flush();

broadcastMsg(n + " join our chat. ");

while (true) {
if (dataInputStream.available() > 0) {
String newMsg = dataInputStream.readUTF();


msgLog += n + ": " + newMsg;
MainActivity.this.runOnUiThread(new Runnable() {

@Override
public void run() {
chatMsg.setText(msgLog);
}
});

broadcastMsg(n + ": " + newMsg);
}

if(!msgToSend.equals("")){
dataOutputStream.writeUTF(msgToSend);
dataOutputStream.flush();
msgToSend = "";
}

}

} catch (IOException e) {
e.printStackTrace();
} finally {
if (dataInputStream != null) {
try {
dataInputStream.close();
} catch (IOException e) {
// TODO Auto-generated catch block
e.printStackTrace();
}
}

if (dataOutputStream != null) {
try {
dataOutputStream.close();
} catch (IOException e) {
// TODO Auto-generated catch block
e.printStackTrace();
}
}

userList.remove(connectClient);

MainActivity.this.runOnUiThread(new Runnable() {

@Override
public void run() {
spUsersAdapter.notifyDataSetChanged();
Toast.makeText(MainActivity.this,
connectClient.name + " removed.", Toast.LENGTH_LONG).show();

msgLog += "-- " + connectClient.name + " leaved ";
MainActivity.this.runOnUiThread(new Runnable() {

@Override
public void run() {
chatMsg.setText(msgLog);
}
});

broadcastMsg("-- " + connectClient.name + " leaved ");
}
});
}

}

private void sendMsg(String msg){
msgToSend = msg;
}

}

private void broadcastMsg(String msg){
for(int i=0; i<userList.size(); i++){
userList.get(i).chatThread.sendMsg(msg);
msgLog += "- send to " + userList.get(i).name + " ";
}

MainActivity.this.runOnUiThread(new Runnable() {

@Override
public void run() {
chatMsg.setText(msgLog);
}
});
}

private String getIpAddress() {
String ip = "";
try {
Enumeration<NetworkInterface> enumNetworkInterfaces = NetworkInterface
.getNetworkInterfaces();
while (enumNetworkInterfaces.hasMoreElements()) {
NetworkInterface networkInterface = enumNetworkInterfaces
.nextElement();
Enumeration<InetAddress> enumInetAddress = networkInterface
.getInetAddresses();
while (enumInetAddress.hasMoreElements()) {
InetAddress inetAddress = enumInetAddress.nextElement();

if (inetAddress.isSiteLocalAddress()) {
ip += "SiteLocalAddress: "
+ inetAddress.getHostAddress() + " ";
}

}

}

} catch (SocketException e) {
// TODO Auto-generated catch block
e.printStackTrace();
ip += "Something Wrong! " + e.toString() + " ";
}

return ip;
}

class ChatClient {
String name;
Socket socket;
ConnectThread chatThread;

@Override
public String toString() {
return name + ": " + socket.getInetAddress().getHostAddress();
}
}
}


activity_main.xml
<?xml version="1.0" encoding="utf-8"?>
<LinearLayout

android_layout_width="match_parent"
android_layout_height="match_parent"
android_padding="16dp"
android_orientation="vertical"
tools_context="com.blogspot.android_er.androidchatserver.MainActivity">

<TextView
android_layout_width="wrap_content"
android_layout_height="wrap_content"
android_layout_gravity="center_horizontal"
android_autoLink="web"
android_text="http://android-er.blogspot.com/"
android_textStyle="bold" />

<TextView
android_layout_width="match_parent"
android_layout_height="wrap_content"
android_text="Char Server"
android_textStyle="bold" />

<TextView
android_id="@+id/infoport"
android_layout_width="wrap_content"
android_layout_height="wrap_content"
android_textStyle="italic" />

<TextView
android_id="@+id/infoip"
android_layout_width="wrap_content"
android_layout_height="wrap_content"
android_textStyle="italic" />

<Spinner
android_id="@+id/spusers"
android_layout_width="match_parent"
android_layout_height="wrap_content"/>

<Button
android_id="@+id/sentto"
android_layout_width="match_parent"
android_layout_height="wrap_content"
android_text="Sent msg to individual user"/>

<ScrollView
android_layout_width="match_parent"
android_layout_height="match_parent" >

<TextView
android_id="@+id/chatmsg"
android_layout_width="wrap_content"
android_layout_height="wrap_content" />
</ScrollView>
</LinearLayout>


download filesDownload the server side files (Android Studio Format) .

Client side same as in the post "Simple Android Chat Application, client side" in Android Studio form.

download filesDownload the client side files (Android Studio Format) .

Read More..

Tuesday, May 3, 2016

Android Bluetooth Terminal


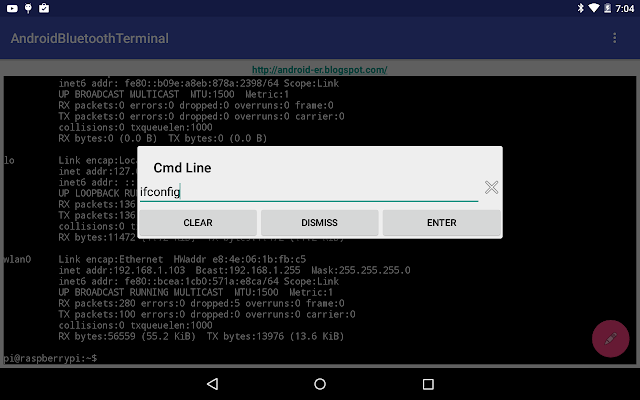
The post in my another blogspot show how to "Config Raspberry Pi to use HC-06 Bluetooth Module, as Serial Terminal".

My former post show how "Android communicate with Arduino + HC-06 Bluetooth Module" to link Android with other serial devices via bluetooth. Actually, it can communicate with Raspberry Pi + HC-06 also.

This example I re-code "Android communicate with Arduino + HC-06 Bluetooth Module" to make it work like a serial terminal to log-in Raspberry Pi via bluetooth.

- Prepare on Raspberry Pi 2, to config serial terminal work on 9600 baud, refer "Config Raspberry Pi to use HC-06 Bluetooth Module, as Serial Terminal".
-  The Android and HC-06 have to pair in advance.


Create a new project of Blank Activity in Android Studio,

layout/content_main.xml, its the main terminal screen.
<?xml version="1.0" encoding="utf-8"?>
<LinearLayout


android_layout_width="match_parent"
android_layout_height="match_parent"
android_padding="5dp"
android_orientation="vertical"
app_layout_behavior="@string/appbar_scrolling_view_behavior"
tools_showIn="@layout/activity_main"
tools_context=".MainActivity">

<TextView
android_layout_width="wrap_content"
android_layout_height="wrap_content"
android_layout_gravity="center_horizontal"
android_autoLink="web"
android_text="http://android-er.blogspot.com/"
android_textStyle="bold" />

<TextView
android_id="@+id/body"
android_layout_width="match_parent"
android_layout_height="match_parent"
android_textColor="@android:color/white"
android_background="@android:color/black"
android_typeface="monospace"
android_gravity="bottom"/>

</LinearLayout>


Edit layout/activity_main.xml, just to change the icon of the FloatingActionButton.
<?xml version="1.0" encoding="utf-8"?>
<android.support.design.widget.CoordinatorLayout


android_layout_width="match_parent"
android_layout_height="match_parent" android_fitsSystemWindows="true"
tools_context=".MainActivity">

<android.support.design.widget.AppBarLayout android_layout_height="wrap_content"
android_layout_width="match_parent" android_theme="@style/AppTheme.AppBarOverlay">

<android.support.v7.widget.Toolbar android_id="@+id/toolbar"
android_layout_width="match_parent" android_layout_height="?attr/actionBarSize"
android_background="?attr/colorPrimary" app_popupTheme="@style/AppTheme.PopupOverlay" />

</android.support.design.widget.AppBarLayout>

<include layout="@layout/content_main" />

<android.support.design.widget.FloatingActionButton android_id="@+id/fab"
android_layout_width="wrap_content" android_layout_height="wrap_content"
android_layout_gravity="bottom|end" android_layout_margin="@dimen/fab_margin"
android_src="@android:drawable/ic_menu_edit" />

</android.support.design.widget.CoordinatorLayout>


Create layout/setting_layout.xml, the layout of SettingDialog (OptionsMenu -> Setting), to list paired bluetooth to connect.
<?xml version="1.0" encoding="utf-8"?>
<LinearLayout

android_orientation="vertical"
android_layout_width="match_parent"
android_layout_height="match_parent">

<ListView
android_id="@+id/pairedlist"
android_layout_width="match_parent"
android_layout_height="match_parent"/>

</LinearLayout>

Create layout/typing_layout.xml, the layout of CmdLineDialog (open once FloatingActionButton is clicked), for user to enter command.
<?xml version="1.0" encoding="utf-8"?>
<LinearLayout

android_orientation="vertical"
android_layout_width="match_parent"
android_layout_height="match_parent">


<LinearLayout
android_layout_width="match_parent"
android_layout_height="wrap_content"
android_orientation="horizontal">
<EditText
android_id="@+id/cmdline"
android_layout_weight="1"
android_layout_width="0dp"
android_layout_height="wrap_content" />

<ImageView
android_id="@+id/clearcmd"
android_layout_width="wrap_content"
android_src="@android:drawable/ic_menu_close_clear_cancel"
android_layout_height="wrap_content" />
</LinearLayout>
<LinearLayout
android_layout_width="match_parent"
android_layout_height="match_parent"
android_orientation="horizontal">
<Button
android_id="@+id/clear"
android_layout_width="0dp"
android_layout_height="wrap_content"
android_layout_weight="1"
android_text="Clear"/>
<Button
android_id="@+id/dismiss"
android_layout_width="0dp"
android_layout_height="wrap_content"
android_layout_weight="1"
android_text="Dismiss"/>
<Button
android_id="@+id/enter"
android_layout_width="0dp"
android_layout_height="wrap_content"
android_layout_weight="1"
android_text="Enter"/>
</LinearLayout>

</LinearLayout>

MainActivity.java
[remark: a bug here, refer Update@2015-11-11on bottom of this post.]
package com.blogspot.android_er.androidbluetoothterminal;

import android.app.Activity;
import android.app.Dialog;
import android.app.DialogFragment;
import android.app.Fragment;
import android.app.FragmentTransaction;
import android.bluetooth.BluetoothAdapter;
import android.bluetooth.BluetoothDevice;
import android.bluetooth.BluetoothSocket;
import android.content.Intent;
import android.content.pm.PackageManager;
import android.os.Bundle;
import android.support.annotation.Nullable;
import android.support.design.widget.FloatingActionButton;
import android.support.v7.app.AppCompatActivity;
import android.support.v7.widget.Toolbar;
import android.text.method.ScrollingMovementMethod;
import android.view.LayoutInflater;
import android.view.Menu;
import android.view.MenuItem;
import android.view.View;
import android.view.ViewGroup;
import android.widget.AdapterView;
import android.widget.ArrayAdapter;
import android.widget.Button;
import android.widget.EditText;
import android.widget.ImageView;
import android.widget.ListView;
import android.widget.TextView;
import android.widget.Toast;

import java.io.IOException;
import java.io.InputStream;
import java.io.OutputStream;
import java.util.ArrayList;
import java.util.Set;
import java.util.UUID;

public class MainActivity extends AppCompatActivity {

private static final int REQUEST_ENABLE_BT = 1;

BluetoothAdapter bluetoothAdapter;

ArrayList<BluetoothDevice> pairedDeviceArrayList;
ArrayAdapter<BluetoothDevice> pairedDeviceAdapter;
private static UUID myUUID;
private final String UUID_STRING_WELL_KNOWN_SPP =
"00001101-0000-1000-8000-00805F9B34FB";

ThreadConnectBTdevice myThreadConnectBTdevice;
ThreadConnected myThreadConnected;

static TextView body;
FloatingActionButton fab;

@Override
protected void onCreate(Bundle savedInstanceState) {
super.onCreate(savedInstanceState);
setContentView(R.layout.activity_main);
Toolbar toolbar = (Toolbar) findViewById(R.id.toolbar);
setSupportActionBar(toolbar);

body = (TextView)findViewById(R.id.body);
body.setMovementMethod(new ScrollingMovementMethod());

fab = (FloatingActionButton) findViewById(R.id.fab);
fab.setOnClickListener(new View.OnClickListener() {
@Override
public void onClick(View view) {
showCmdLineDialog();
}
});

fab.setEnabled(false);
fab.setVisibility(FloatingActionButton.GONE);

if (!getPackageManager().hasSystemFeature(PackageManager.FEATURE_BLUETOOTH)){
Toast.makeText(this,
"FEATURE_BLUETOOTH NOT support",
Toast.LENGTH_LONG).show();
finish();
return;
}

//using the well-known SPP UUID
myUUID = UUID.fromString(UUID_STRING_WELL_KNOWN_SPP);

bluetoothAdapter = BluetoothAdapter.getDefaultAdapter();
if (bluetoothAdapter == null) {
Toast.makeText(this,
"Bluetooth is not supported on this hardware platform",
Toast.LENGTH_LONG).show();
finish();
return;
}

String strInfo = bluetoothAdapter.getName() + " " +
bluetoothAdapter.getAddress();
Toast.makeText(getApplicationContext(), strInfo, Toast.LENGTH_LONG).show();

}

@Override
protected void onStart() {
super.onStart();

//Turn ON BlueTooth if it is OFF
if (!bluetoothAdapter.isEnabled()) {
Intent enableIntent = new Intent(BluetoothAdapter.ACTION_REQUEST_ENABLE);
startActivityForResult(enableIntent, REQUEST_ENABLE_BT);
}
}

@Override
protected void onDestroy() {
super.onDestroy();
closeThreads();
}

private void closeThreads(){
if(myThreadConnectBTdevice!=null){
myThreadConnectBTdevice.cancel();
myThreadConnectBTdevice = null;
}

if(myThreadConnected!=null){
myThreadConnected.cancel();
myThreadConnected = null;
}
}

@Override
protected void onActivityResult(int requestCode, int resultCode, Intent data) {
if(requestCode==REQUEST_ENABLE_BT){
if(resultCode == Activity.RESULT_OK){

}else{
Toast.makeText(this,
"BlueTooth NOT enabled",
Toast.LENGTH_SHORT).show();
finish();
}
}
}

@Override
public boolean onCreateOptionsMenu(Menu menu) {
// Inflate the menu; this adds items to the action bar if it is present.
getMenuInflater().inflate(R.menu.menu_main, menu);
return true;
}

@Override
public boolean onOptionsItemSelected(MenuItem item) {
// Handle action bar item clicks here. The action bar will
// automatically handle clicks on the Home/Up button, so long
// as you specify a parent activity in AndroidManifest.xml.
int id = item.getItemId();

//noinspection SimplifiableIfStatement
if (id == R.id.action_settings) {
closeThreads();
fab.setEnabled(false);
fab.setVisibility(FloatingActionButton.GONE);
body.setText("");
showSettingDialog();
return true;
}

return super.onOptionsItemSelected(item);
}

void showSettingDialog() {
FragmentTransaction ft = getFragmentManager().beginTransaction();
Fragment prev = getFragmentManager().findFragmentByTag("dialog");
if (prev != null) {
ft.remove(prev);
}
ft.addToBackStack(null);

DialogFragment newFragment = SettingDialogFragment.newInstance(MainActivity.this);
newFragment.show(ft, "dialog");

}

void showCmdLineDialog() {

if(myThreadConnected == null){
Toast.makeText(MainActivity.this,
"myThreadConnected == null",
Toast.LENGTH_LONG).show();
return;
}

FragmentTransaction ft = getFragmentManager().beginTransaction();
Fragment prev = getFragmentManager().findFragmentByTag("cmdline");
if (prev != null) {
ft.remove(prev);
}
ft.addToBackStack(null);

DialogFragment newFragment = TypingDialogFragment.newInstance(MainActivity.this, myThreadConnected);
newFragment.show(ft, "cmdline");

}

private void setup(ListView lv, final Dialog dialog) {
Set<BluetoothDevice> pairedDevices = bluetoothAdapter.getBondedDevices();
if (pairedDevices.size() > 0) {
pairedDeviceArrayList = new ArrayList<BluetoothDevice>();

for (BluetoothDevice device : pairedDevices) {
pairedDeviceArrayList.add(device);
}

pairedDeviceAdapter = new ArrayAdapter<BluetoothDevice>(this,
android.R.layout.simple_list_item_1, pairedDeviceArrayList);
lv.setAdapter(pairedDeviceAdapter);

lv.setOnItemClickListener(new AdapterView.OnItemClickListener() {

@Override
public void onItemClick(AdapterView<?> parent, View view,
int position, long id) {
BluetoothDevice device =
(BluetoothDevice) parent.getItemAtPosition(position);
Toast.makeText(MainActivity.this,
"Name: " + device.getName() + " "
+ "Address: " + device.getAddress() + " "
+ "BondState: " + device.getBondState() + " "
+ "BluetoothClass: " + device.getBluetoothClass() + " "
+ "Class: " + device.getClass(),
Toast.LENGTH_LONG).show();

Toast.makeText(MainActivity.this, "start ThreadConnectBTdevice", Toast.LENGTH_LONG).show();
myThreadConnectBTdevice = new ThreadConnectBTdevice(device, dialog);
myThreadConnectBTdevice.start();
}
});
}
}

public static class SettingDialogFragment extends DialogFragment {

ListView listViewPairedDevice;
static MainActivity parentActivity;

static SettingDialogFragment newInstance(MainActivity parent){
parentActivity = parent;
SettingDialogFragment f = new SettingDialogFragment();
return f;
}

@Nullable
@Override
public View onCreateView(LayoutInflater inflater,
ViewGroup container, Bundle savedInstanceState) {
getDialog().setTitle("Setting");
getDialog().setCanceledOnTouchOutside(false);
View settingDialogView = inflater.inflate(R.layout.setting_layout, container, false);

listViewPairedDevice = (ListView)settingDialogView.findViewById(R.id.pairedlist);

parentActivity.setup(listViewPairedDevice, getDialog());

return settingDialogView;
}
}

public static class TypingDialogFragment extends DialogFragment {

EditText cmdLine;
static MainActivity parentActivity;
static ThreadConnected cmdThreadConnected;

static TypingDialogFragment newInstance(MainActivity parent, ThreadConnected thread){
parentActivity = parent;
cmdThreadConnected = thread;
TypingDialogFragment f = new TypingDialogFragment();
return f;
}

@Nullable
@Override
public View onCreateView(LayoutInflater inflater,
ViewGroup container, Bundle savedInstanceState) {
getDialog().setTitle("Cmd Line");
getDialog().setCanceledOnTouchOutside(false);
View typingDialogView = inflater.inflate(R.layout.typing_layout, container, false);

cmdLine = (EditText)typingDialogView.findViewById(R.id.cmdline);

ImageView imgCleaarCmd = (ImageView)typingDialogView.findViewById(R.id.clearcmd);
imgCleaarCmd.setOnClickListener(new View.OnClickListener() {
@Override
public void onClick(View v) {
cmdLine.setText("");
}
});

Button btnEnter = (Button)typingDialogView.findViewById(R.id.enter);
btnEnter.setOnClickListener(new View.OnClickListener() {
@Override
public void onClick(View v) {
if(cmdThreadConnected!=null){
byte[] bytesToSend = cmdLine.getText().toString().getBytes();
cmdThreadConnected.write(bytesToSend);
byte[] NewLine = " ".getBytes();
cmdThreadConnected.write(NewLine);
}
}
});

Button btnDismiss = (Button)typingDialogView.findViewById(R.id.dismiss);
btnDismiss.setOnClickListener(new View.OnClickListener() {
@Override
public void onClick(View v) {
dismiss();
}
});

Button btnClear = (Button)typingDialogView.findViewById(R.id.clear);
btnClear.setOnClickListener(new View.OnClickListener() {
@Override
public void onClick(View v) {
body.setText("");
}
});

return typingDialogView;
}
}

//Called in ThreadConnectBTdevice once connect successed
//to start ThreadConnected
private void startThreadConnected(BluetoothSocket socket){

myThreadConnected = new ThreadConnected(socket);
myThreadConnected.start();
}

/*
ThreadConnectBTdevice:
Background Thread to handle BlueTooth connecting
*/
private class ThreadConnectBTdevice extends Thread {

private BluetoothSocket bluetoothSocket = null;
private final BluetoothDevice bluetoothDevice;
Dialog dialog;

private ThreadConnectBTdevice(BluetoothDevice device, Dialog dialog) {
this.dialog = dialog;
bluetoothDevice = device;

try {
bluetoothSocket = device.createRfcommSocketToServiceRecord(myUUID);
Toast.makeText(MainActivity.this,
"bluetoothSocket: " + bluetoothSocket,
Toast.LENGTH_SHORT).show();
} catch (IOException e) {
// TODO Auto-generated catch block
e.printStackTrace();
}
}

@Override
public void run() {
boolean success = false;
try {
bluetoothSocket.connect();
success = true;
} catch (IOException e) {
e.printStackTrace();

final String eMessage = e.getMessage();
runOnUiThread(new Runnable() {

@Override
public void run() {
Toast.makeText(MainActivity.this,
"something wrong bluetoothSocket.connect(): " + eMessage,
Toast.LENGTH_SHORT).show();
}
});

try {
bluetoothSocket.close();
} catch (IOException e1) {
// TODO Auto-generated catch block
e1.printStackTrace();
}
}

if(success){
//connect successful
final String msgconnected = "connect successful: "
+ "BluetoothSocket: " + bluetoothSocket + " "
+ "BluetoothDevice: " + bluetoothDevice;

runOnUiThread(new Runnable() {

@Override
public void run() {
fab.setEnabled(true);
fab.setVisibility(FloatingActionButton.VISIBLE);
body.setText("");
Toast.makeText(MainActivity.this, msgconnected, Toast.LENGTH_LONG).show();
dialog.dismiss();
}
});

startThreadConnected(bluetoothSocket);

}else{
//fail
}
}

public void cancel() {

Toast.makeText(getApplicationContext(),
"close bluetoothSocket",
Toast.LENGTH_LONG).show();
try {
bluetoothSocket.close();
} catch (IOException e) {
// TODO Auto-generated catch block
e.printStackTrace();
}

}

}

/*
ThreadConnected:
Background Thread to handle Bluetooth data communication
after connected
*/
private class ThreadConnected extends Thread {
private final BluetoothSocket connectedBluetoothSocket;
private final InputStream connectedInputStream;
private final OutputStream connectedOutputStream;

boolean running;

public ThreadConnected(BluetoothSocket socket) {
connectedBluetoothSocket = socket;
InputStream in = null;
OutputStream out = null;
running = true;
try {
in = socket.getInputStream();
out = socket.getOutputStream();
} catch (IOException e) {
// TODO Auto-generated catch block
e.printStackTrace();
}

connectedInputStream = in;
connectedOutputStream = out;
}

@Override
public void run() {
byte[] buffer = new byte[1024];
int bytes;

String strRx = "";

while (running) {
try {
bytes = connectedInputStream.read(buffer);
final String strReceived = new String(buffer, 0, bytes);
final String strByteCnt = String.valueOf(bytes) + " bytes received. ";

runOnUiThread(new Runnable(){

@Override
public void run() {
body.append(strReceived);
}});

} catch (IOException e) {
// TODO Auto-generated catch block
e.printStackTrace();

final String msgConnectionLost = "Connection lost: "
+ e.getMessage();
runOnUiThread(new Runnable(){

@Override
public void run() {
Toast.makeText(MainActivity.this, msgConnectionLost, Toast.LENGTH_LONG).show();

}});
}
}
}

public void write(byte[] buffer) {
try {
connectedOutputStream.write(buffer);
} catch (IOException e) {
// TODO Auto-generated catch block
e.printStackTrace();
}
}

public void cancel() {
running = false;
try {
connectedBluetoothSocket.close();
} catch (IOException e) {
// TODO Auto-generated catch block
e.printStackTrace();
}
}
}

}


uses-permission of "android.permission.BLUETOOTH" is needed in src/main/AndroidManifest.xml.
<?xml version="1.0" encoding="utf-8"?>
<manifest
package="com.blogspot.android_er.androidbluetoothterminal" >

<uses-permission android_name="android.permission.BLUETOOTH"/>
<application
android_allowBackup="true"
android_icon="@mipmap/ic_launcher"
android_label="@string/app_name"
android_supportsRtl="true"
android_theme="@style/AppTheme" >
<activity
android_name=".MainActivity"
android_label="@string/app_name"
android_theme="@style/AppTheme.NoActionBar" >
<intent-filter>
<action android_name="android.intent.action.MAIN" />

<category android_name="android.intent.category.LAUNCHER" />
</intent-filter>
</activity>
</application>

</manifest>


download filesDownload the files (Android Studio Format) .

download filesDownload APK .


Update@2015-11-11:
In the above code of MainActivity.java, in run() of ThreadConnected, if Connection lost (such as Raspberry Pi or HC-06 power OFF), the thread will still keep running.

So have to cancel the thread and disable the FloatingActionButton. Modify run() of ThreadConnected.
 @Override
public void run() {
byte[] buffer = new byte[1024];
int bytes;

String strRx = "";

while (running) {
try {
bytes = connectedInputStream.read(buffer);
final String strReceived = new String(buffer, 0, bytes);
final String strByteCnt = String.valueOf(bytes) + " bytes received. ";

runOnUiThread(new Runnable(){

@Override
public void run() {
body.append(strReceived);
}});

} catch (IOException e) {
// TODO Auto-generated catch block
e.printStackTrace();

cancel();

final String msgConnectionLost = "Connection lost: "
+ e.getMessage();
runOnUiThread(new Runnable(){

@Override
public void run() {
Toast.makeText(MainActivity.this, msgConnectionLost, Toast.LENGTH_LONG).show();

fab.setEnabled(false);
fab.setVisibility(FloatingActionButton.GONE);


}});
}
}
}


Read More..

Saturday, April 30, 2016

Setup Hardware Devices debugging for Android Studio on Ubuntu 15 10

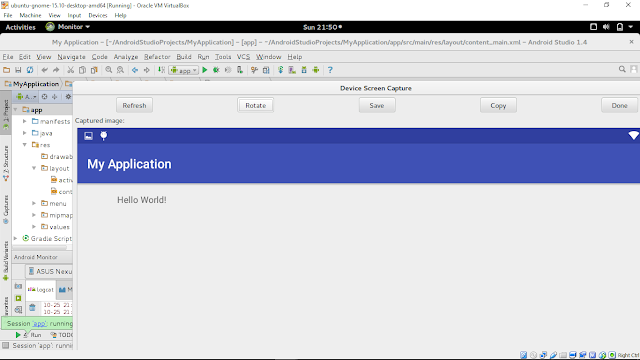
This video show how to setup /etc/udev/rules.d/51-android.rules in Ubuntu (behind VirtualBox) to enable hardware device debugging in Android Studio.


The development platform is 64-bit Ubuntu-GNOME 15.10 running in VirtualBox, with Android Studio installed with Ubuntu Make (umake).

To enable hardware device debugging in Ubuntu, you have to create /etc/udev/rules.d/51-android.rules file to add device IDs for your debugging devices. (refer: Android Developers Document Using Hardware Devices - Setting up a Device for Development)

Create /etc/udev/rules.d/51-android.rules file with sudo right, add the line and save:
SUBSYSTEM=="usb", ATTR{idVendor}=="18d1", MODE="0666", GROUP="plugdev"
where "18d1" is the USB Vendor ID for Google, Nexus 7 in my case.

Run the command:
$ sudo chmod a+r /etc/udev/rules.d/51-android.rules

This video show how to, behind VirtualBox.

Read More..

Friday, April 29, 2016

Android popup messages using Toast

In Android you can display pop up messages that lasts for a certain duration and then disappears-using the Toast class.

Toast is a transient message that appears and disappears without any interaction from the user and with no notification to the program that it disappeared.

the Toast can display a simple text message or a complex view.

Displaying simple text:

to display a simple toast that displays a text message we use the following code:
Toast toast=Toast.makeText(this, "Hello toast", 2000);
toast.setGravity(Gravity.TOP, -30, 50);
toast.show();

we create the toast using the static Toast.makeText(Context con,String message, int duration) method to create a toast in the current context to display a text message for a duration specified in milli seconds or we can use the constant values Toast.LENGTH_SHORT to display for a short duration or Toast.LENGTH_LONG for longer duration.
The toast by default appears in the center of the screen, you can change the default position by specifying the Gravity and the X and Y offsets.
finally we call the Show() method to display the toast.

the previous toast will be like this:

Displaying complex views:


Toasts can also display complex views. this is done like this:

First: create a layout xml file in res/layout directory. the file must be named toast_layout.xml.
<?xml version="1.0" encoding="utf-8"?>
<LinearLayout
android_orientation="vertical"
android_layout_width="fill_parent"
android_layout_height="fill_parent"
android_id="@+id/toastView"
>
<TextView
android_layout_width="fill_parent"
android_layout_height="wrap_content"
android_text="Hello toast"
android_textColor="#000"
/>
<TextView
android_layout_width="fill_parent"
android_layout_height="wrap_content"
android_id="@+id/txtDate"
android_textColor="#000"
/>


</LinearLayout>

then from the code
Toast toast=new Toast(this);
LayoutInflater inflater=this.getLayoutInflater();
View toastView=inflater.inflate(R.layout.toast_layout, (ViewGroup)findViewById(R.id.toastView));
TextView txtDate=(TextView)toastView.findViewById(R.id.txtDate);
txtDate.setText("toast appeared at "+Calendar.getInstance().getTime().toLocaleString());
toast.setGravity(Gravity.CENTER, 0, 0);
toast.setView(toastView);
toast.show();

the toast will be like this:
Notes:
  • In the toast_layout.xml width, if you put any buttons or any control that has a callback, it would appear disabled and the user cannot interact with it.
  • The toast can be created in two ways: by calling Toast.makeText method or by specifyinga view via setView method. when you want to display a simple text use the first one otherwise use the second. if you try to interchange or combie between the two methods an exception will be thrown.
Read More..

Saturday, April 23, 2016

Getting started with Android development tools

Hi in this post we’ll know what tools we will use to start developing Android applications.


We’re going to download the latest Android SDK from this location http://developer.android.com/sdk/index.html

Then we’ll download Eclipse IDE from this location

http://www.eclipse.org/downloads/download.php?file=/eclipse/downloads/drops/R-3.5.1-200909170800/eclipse-SDK-3.5.1-win32.zip

then follow the installation steps from this link

http://developer.android.com/sdk/eclipse-adt.html

after you finish you will be ready to start developing Android Applications
Read More..

Thursday, April 21, 2016

Using SQLite Database with Android

Android default Database engine is Lite. SQLite is a lightweight transactional database engine that occupies small amout of disk storage and memory, so its a perfect choice for creating databases on many mobile operating systems such as Android, iOS.

Things to consider when dealing with SQLite:
  1. Data type integrity is not maintained in SQLite, you can put a value of a certain data type in a column of another dataype (put string in an integer and vice versa).
  2. Referential integrity is not maintained in SQLite, there is no FOREIGN KEY constraints or JOIN statements.
  3. SQLite Full Unicode support is optional and not installed by default.

In this tutorial we will create a simple database application to store employees data.

the DB has:
Tables:
  1. Employees
  2. Dept.
Views:
  1. ViewEmps: to display employees and their relative departments.


Creating SQLite Database

By default SQLite on Android does not have a management interface or an application to create and manage data bases from, so were going to create the database ourselves by code.

First we will create a class that handles all the operations required to deal with the database such as creating the database, creating tables, inserting and deleting records and so on.

The first step is to create a class that inherits from SQLiteOpenHelper class. this class provides two methods to override to deal with the database:
  1. onCreate(SQLiteDatabase db): invoked when the database is created, this is where we can create tables and columns to them, create views or triggers.
  2. onUpgrade(SQLiteDatabse db, int oldVersion, int newVersion): invoked when we make a modification to the database such as altering, dropping , creating new tables.


our class will have the following members
public class DatabaseHelper extends SQLiteOpenHelper {

static final String dbName="demoDB";
static final String employeeTable="Employees";
static final String colID="EmployeeID";
static final String colName="EmployeeName";
static final String colAge="Age";
static final String colDept="Dept";

static final String deptTable="Dept";
static final String colDeptID="DeptID";
static final String colDeptName="DeptName";

static final String viewEmps="ViewEmps";

The Constructor:
public DatabaseHelper(Context context) {
super(context, dbName, null,33);
}

The constructor of the super class has the following parameters:

Context con: the context attached to the database.
dataBaseName: the name of the database.
CursorFactory: some times we may use a class that extends the Cursor class to implement some extra validations or operations on the queries run on the database. In this case we pass an instance of CusrsorFactory to return a reference to our derived class to be used instead of the default cursor,
In this example we are going to use the standard Cursor Interface to retrieve results, so the CursorFactory parameter is going to be null.

Version: the version of the schema of the database.

The constructor creates a new blank database with the specified name and version.

Creating the database:

The first superclass method to override is onCreate(SQLiteDatabase db):
public void onCreate(SQLiteDatabase db) {
// TODO Auto-generated method stub

db.execSQL("CREATE TABLE "+deptTable+" ("+colDeptID+ " INTEGER PRIMARY KEY , "+
colDeptName+ " TEXT)");

db.execSQL("CREATE TABLE "+employeeTable+" ("+colID+" INTEGER PRIMARY KEY AUTOINCREMENT, "+
colName+" TEXT, "+colAge+" Integer, "+colDept+" INTEGER NOT NULL ,FOREIGN KEY ("+colDept+") REFERENCES "+deptTable+" ("+colDeptID+"));");


db.execSQL("CREATE TRIGGER fk_empdept_deptid " +
" BEFORE INSERT "+
" ON "+employeeTable+

" FOR EACH ROW BEGIN"+
" SELECT CASE WHEN ((SELECT "+colDeptID+" FROM "+deptTable+" WHERE "+colDeptID+"=new."+colDept+" ) IS NULL)"+
" THEN RAISE (ABORT,Foreign Key Violation) END;"+
" END;");

db.execSQL("CREATE VIEW "+viewEmps+
" AS SELECT "+employeeTable+"."+colID+" AS _id,"+
" "+employeeTable+"."+colName+","+
" "+employeeTable+"."+colAge+","+
" "+deptTable+"."+colDeptName+""+
" FROM "+employeeTable+" JOIN "+deptTable+
" ON "+employeeTable+"."+colDept+" ="+deptTable+"."+colDeptID
);
//Inserts pre-defined departments
InsertDepts(db);

}


the method creates tables with columns,a view and a trigger.

The method is invoked when the database is created. So we create our table and specify the columns.

This method is invoked when the database does not exist on the disk, it’s executed only once on the same device at the first time the application is run on the device.

Upgrading the database:

some times we want to upgrade the database by changing the schema, add new tables or change column data types.
this is done by overriding onUpdate(SQLiteDatabase db,int old Version,int newVerison) method:

public void onUpgrade(SQLiteDatabase db, int oldVersion, int newVersion) {
// TODO Auto-generated method stub

db.execSQL("DROP TABLE IF EXISTS "+employeeTable);
db.execSQL("DROP TABLE IF EXISTS "+deptTable);

db.execSQL("DROP TRIGGER IF EXISTS dept_id_trigger");
db.execSQL("DROP TRIGGER IF EXISTS dept_id_trigger22");
db.execSQL("DROP TRIGGER IF EXISTS fk_empdept_deptid");
db.execSQL("DROP VIEW IF EXISTS "+viewEmps);
onCreate(db);
}


This method is invoked when the version number specified in the constructor of the class changes.

when you want to append a change to your database you must change the version number in the constructor of the class:

so when you pass the constructor a version number of 2:
public DatabaseHelper(Context context) {
super(context, dbName, null,2);

// TODO Auto-generated constructor stub
}
instead of 1:
super(context, dbName, null,2);
the application understands that you want to upgrade the database and onUpgrade method will be invoked

A typical implementation of this method is to drop the tables and create them again with the additional modifications.

Managing Foreign-Key Constraints:

we mentioned before that SQLite 3 by default does not support foreign key constraint, however we can force such a constraint using TRIGGERS:

we will create a trigger that ensures that when a new Employee is inserted his/her Dept value is present in the original Dept table.

the sql statement to create such a trigger would be like this:
CREATE TRIGGER fk_empdept_deptid Before INSERT ON Employees 
FOR EACH ROW BEGIN
SELECT CASE WHEN ((SELECT DeptID FROM Dept WHERE DeptID =new.Dept ) IS NULL)
THEN RAISE (ABORT,Foreign Key Violation) END;
END

in onCreate method we created this trigger like this:
db.execSQL("CREATE TRIGGER fk_empdept_deptid " +
" BEFORE INSERT "+
" ON "+employeeTable+

" FOR EACH ROW BEGIN"+
" SELECT CASE WHEN ((SELECT "+colDeptID+" FROM "+deptTable+" WHERE "+colDeptID+"=new."+colDept+" ) IS NULL)"+
" THEN RAISE (ABORT,Foreign Key Violation) END;"+
" END;");


Executing SQL statements:

now lets begin executing basic sql statements. you can execute any sql statement that is not a query whether it is insert, delete, update or anything using db.execSQL(String statement) method like when we did when creating the database tables:
db.execSQL("CREATE TABLE "+deptTable+" ("+colDeptID+ " INTEGER PRIMARY KEY , "+
colDeptName+ " TEXT)");

Inserting records:

we insert records to the databse using the following code for example to insert records in the Dept table:
SQLiteDatabase db=this.getWritableDatabase();
ContentValues cv=new ContentValues();
cv.put(colDeptID, 1);
cv.put(colDeptName, "Sales");
db.insert(deptTable, colDeptID, cv);

cv.put(colDeptID, 2);
cv.put(colDeptName, "IT");
db.insert(deptTable, colDeptID, cv);
db.close();

notice that we need to call this.getWritableDatabase() to open the connection with the database for reading/writing.
the ContentValues.put has two parameters: Column Name and the value to be inserted.

also it is a good practice to close the database after executing statements.

Updating values:

to execute an update statement we have two ways

  1. to execute db.execSQL
  2. to execute db.update method:
public int UpdateEmp(Employee emp)
{
SQLiteDatabase db=this.getWritableDatabase();
ContentValues cv=new ContentValues();
cv.put(colName, emp.getName());
cv.put(colAge, emp.getAge());
cv.put(colDept, emp.getDept());
return db.update(employeeTable, cv, colID+"=?", new String []{String.valueOf(emp.getID())});

}

the update method has the following parameters:

  1. String Table: the table to update a value in
  2. ContentValues cv: the content values object that has the new values
  3. String where clause: the WHERE clause to specify which record to update.
  4. String[] args: the arguments of the WHERE clause.
Deleteing rows:

as in update to execute a delete statement we have two ways

  1. to execute db.execSQL
  2. to execute db.delete method:
public void DeleteEmp(Employee emp)
{
SQLiteDatabase db=this.getWritableDatabase();
db.delete(employeeTable,colID+"=?", new String [] {String.valueOf(emp.getID())});
db.close();
}

the delete method has the same parameters as the update method.

Executing queries:

to execute queries there are two methods:

  1. Execute db.rawQuery method.
  2. Execute db.query method.

to execute a raw query to retreive all departments
Cursor getAllDepts()
{
SQLiteDatabase db=this.getReadableDatabase();
Cursor cur=db.rawQuery("SELECT "+colDeptID+" as _id, "+colDeptName+" from "+deptTable,new String [] {});

return cur;
}

the rawQuery method has two parameters:

  1. String query: the select statement.
  2. String[] selection args: the arguments if a WHERE clause is included in the select statement.

Notes:
  1. The result of a query is returned in Cursor object.
  2. In a select statement if the primary key column (the id column) of the table has a name other than _id then you have to use an alias in the form SELECT [Column Name] as _id
  3. cause the Cursor object always expects that the primary key column has the name _id or it will throw an exception .


another way to perform a query is to use a db.query method.

a query to select all employees in a certain department from a view would be like this:
public Cursor getEmpByDept(String Dept)
{
SQLiteDatabase db=this.getReadableDatabase();
String [] columns=new String[]{"_id",colName,colAge,colDeptName};
Cursor c=db.query(viewEmps, columns, colDeptName+"=?", new String[]{Dept}, null, null, null);
return c;
}

the db.query has the folowing parameters:
  1. String Table Name: the name of the table to run the query against.
  2. String [ ] columns: the projection of the query i.e the columns to retrieve.
  3. String WHERE clause: where clause, if none pass null.
  4. String [ ] selection args: the parameters of the WHERE clause.
  5. String Group by: a string specifying group by clause.
  6. String Having: a string specifying HAVING clause.
  7. String Order By by: a string Order By by clause.
Managing Cursors:

Result sets of queries are returned in Cursor objects.
there are some common methdos that you will use with cursors:
  1. boolean moveToNext(): moves the cursor by one record in the result set, returns false if moved past the last row in the result set.
  2. boolean moveToFirst(): moves the cursor to the first row in the result set, returns false if the result set is empty.
  3. boolean moveToPosition(int position): moves the cursor to a certain row index within the boolean result set, returns false if the position is un-reachable
  4. boolean moveToPrevious():moves the cursor to the preevious row in the result set, returns false if the cursor is past the first row.
  5. boolean moveToLast():moves the cursor to the lase row in the result set, returns false if the result set is empty.

there are also some useful methods to check the position of a cursor:
boolean isAfterLast(), isBeforeFirst, isFirst,isLast and isNull(columnIndex).


also if you have a result set of only one row and you need to retreive values of certain columns, you can do it like this:
public int GetDeptID(String Dept)
{
SQLiteDatabase db=this.getReadableDatabase();
Cursor c=db.query(deptTable, new String[]{colDeptID+" as _id",colDeptName},colDeptName+"=?", new String[]{Dept}, null, null, null);
//Cursor c=db.rawQuery("SELECT "+colDeptID+" as _id FROM "+deptTable+" WHERE "+colDeptName+"=?", new String []{Dept});
c.moveToFirst();
return c.getInt(c.getColumnIndex("_id"));

}

we have Cursor.getColumnIndex(String ColumnName) to get the index of a column.

then to get the value of a certain column we have Cursor.getInt(int ColumnIndex) method.
also there are getShort,getString,getDouble, getBlob to return the value as a byte array.

its a good practice to close() the cursor after using it.

Download a sample application on using database in Android from here
Read More..

Monday, April 11, 2016

Calling REST Web Services with Android

Requesting REST web service:   you request REST web services by calling a URL with the parameters. like this
http://example.com/resources/getitems

an example of calling a REST web service:
String callWebErvice(String serviceURL){
// http get client
HttpClient client=new DefaultHttpClient();
HttpGet getRequest=new HttpGet();

try {
// construct a URI object
getRequest.setURI(new URI(serviceURL));
} catch (URISyntaxException e) {
Log.e("URISyntaxException", e.toString());
}

// buffer reader to read the response
BufferedReader in=null;
// the service response
HttpResponse response=null;
try {
// execute the request
response = client.execute(getRequest);
} catch (ClientProtocolException e) {
Log.e("ClientProtocolException", e.toString());
} catch (IOException e) {
Log.e("IO exception", e.toString());
}
try {
in=new BufferedReader(new InputStreamReader(response.getEntity().getContent()));
} catch (IllegalStateException e) {
Log.e("IllegalStateException", e.toString());
} catch (IOException e) {
Log.e("IO exception", e.toString());
}
StringBuffer buff=new StringBuffer("");
String line="";
try {
while((line=in.readLine())!=null)
{
buff.append(line);
}
} catch (IOException e) {
Log.e("IO exception", e.toString());
return e.getMessage();
}


try {
in.close();
} catch (IOException e) {
Log.e("IO exception", e.toString());
}
// response, need to be parsed
return buff.toString();
}
Read More..

Wednesday, April 6, 2016

Android communicate with Arduino HC 06 Bluetooth Module part II

Its my old post "Android example to communicate with Bluetooth device, HC-06 Bluetooth Module", to make a Android phone communicate with Arduino + HC-06 Bluetooth Module. In the example, the first byte always lost.

After more test, I found that the first byte not lost. Because the byte stream sent from Arduino not in sync with Android side, and the bytes may be separated in different slot received in Android ThreadConnected, and the old slot covered by the new slot.

To show it, I modify it not to clear the TextView.


MainActivity.java
/*
Android Example to connect to and communicate with Bluetooth
In this exercise, the target is a Arduino Due + HC-06 (Bluetooth Module)

Ref:
- Make BlueTooth connection between Android devices
http://android-er.blogspot.com/2014/12/make-bluetooth-connection-between.html
- Bluetooth communication between Android devices
http://android-er.blogspot.com/2014/12/bluetooth-communication-between-android.html
*/
package com.example.androidbtcontrol;

import android.app.Activity;
import android.bluetooth.BluetoothAdapter;
import android.bluetooth.BluetoothDevice;
import android.bluetooth.BluetoothSocket;
import android.content.Intent;
import android.content.pm.PackageManager;
import android.os.Bundle;
import android.support.v7.app.ActionBarActivity;
import android.view.View;
import android.widget.AdapterView;
import android.widget.ArrayAdapter;
import android.widget.Button;
import android.widget.EditText;
import android.widget.LinearLayout;
import android.widget.ListView;
import android.widget.TextView;
import android.widget.Toast;

import java.io.IOException;
import java.io.InputStream;
import java.io.OutputStream;
import java.util.ArrayList;
import java.util.Set;
import java.util.UUID;

public class MainActivity extends ActionBarActivity {

private static final int REQUEST_ENABLE_BT = 1;

BluetoothAdapter bluetoothAdapter;

ArrayList<BluetoothDevice> pairedDeviceArrayList;

TextView textInfo, textStatus, textByteCnt;
ListView listViewPairedDevice;
LinearLayout inputPane;
EditText inputField;
Button btnSend, btnClear;

ArrayAdapter<BluetoothDevice> pairedDeviceAdapter;
private UUID myUUID;
private final String UUID_STRING_WELL_KNOWN_SPP =
"00001101-0000-1000-8000-00805F9B34FB";

ThreadConnectBTdevice myThreadConnectBTdevice;
ThreadConnected myThreadConnected;

@Override
protected void onCreate(Bundle savedInstanceState) {
super.onCreate(savedInstanceState);
setContentView(R.layout.activity_main);

textInfo = (TextView)findViewById(R.id.info);
textStatus = (TextView)findViewById(R.id.status);
textByteCnt = (TextView)findViewById(R.id.textbyteCnt);
listViewPairedDevice = (ListView)findViewById(R.id.pairedlist);

inputPane = (LinearLayout)findViewById(R.id.inputpane);
inputField = (EditText)findViewById(R.id.input);
btnSend = (Button)findViewById(R.id.send);
btnSend.setOnClickListener(new View.OnClickListener(){

@Override
public void onClick(View v) {
if(myThreadConnected!=null){
byte[] bytesToSend = inputField.getText().toString().getBytes();
myThreadConnected.write(bytesToSend);
byte[] NewLine = " ".getBytes();
myThreadConnected.write(NewLine);
}
}});

btnClear = (Button)findViewById(R.id.clear);
btnClear.setOnClickListener(new View.OnClickListener() {
@Override
public void onClick(View v) {
textStatus.setText("");
textByteCnt.setText("");
}
});

if (!getPackageManager().hasSystemFeature(PackageManager.FEATURE_BLUETOOTH)){
Toast.makeText(this,
"FEATURE_BLUETOOTH NOT support",
Toast.LENGTH_LONG).show();
finish();
return;
}

//using the well-known SPP UUID
myUUID = UUID.fromString(UUID_STRING_WELL_KNOWN_SPP);

bluetoothAdapter = BluetoothAdapter.getDefaultAdapter();
if (bluetoothAdapter == null) {
Toast.makeText(this,
"Bluetooth is not supported on this hardware platform",
Toast.LENGTH_LONG).show();
finish();
return;
}

String stInfo = bluetoothAdapter.getName() + " " +
bluetoothAdapter.getAddress();
textInfo.setText(stInfo);
}

@Override
protected void onStart() {
super.onStart();

//Turn ON BlueTooth if it is OFF
if (!bluetoothAdapter.isEnabled()) {
Intent enableIntent = new Intent(BluetoothAdapter.ACTION_REQUEST_ENABLE);
startActivityForResult(enableIntent, REQUEST_ENABLE_BT);
}

setup();
}

private void setup() {
Set<BluetoothDevice> pairedDevices = bluetoothAdapter.getBondedDevices();
if (pairedDevices.size() > 0) {
pairedDeviceArrayList = new ArrayList<BluetoothDevice>();

for (BluetoothDevice device : pairedDevices) {
pairedDeviceArrayList.add(device);
}

pairedDeviceAdapter = new ArrayAdapter<BluetoothDevice>(this,
android.R.layout.simple_list_item_1, pairedDeviceArrayList);
listViewPairedDevice.setAdapter(pairedDeviceAdapter);

listViewPairedDevice.setOnItemClickListener(new AdapterView.OnItemClickListener() {

@Override
public void onItemClick(AdapterView<?> parent, View view,
int position, long id) {
BluetoothDevice device =
(BluetoothDevice) parent.getItemAtPosition(position);
Toast.makeText(MainActivity.this,
"Name: " + device.getName() + " "
+ "Address: " + device.getAddress() + " "
+ "BondState: " + device.getBondState() + " "
+ "BluetoothClass: " + device.getBluetoothClass() + " "
+ "Class: " + device.getClass(),
Toast.LENGTH_LONG).show();

textStatus.setText("start ThreadConnectBTdevice");
myThreadConnectBTdevice = new ThreadConnectBTdevice(device);
myThreadConnectBTdevice.start();
}
});
}
}

@Override
protected void onDestroy() {
super.onDestroy();

if(myThreadConnectBTdevice!=null){
myThreadConnectBTdevice.cancel();
}
}

@Override
protected void onActivityResult(int requestCode, int resultCode, Intent data) {
if(requestCode==REQUEST_ENABLE_BT){
if(resultCode == Activity.RESULT_OK){
setup();
}else{
Toast.makeText(this,
"BlueTooth NOT enabled",
Toast.LENGTH_SHORT).show();
finish();
}
}
}

//Called in ThreadConnectBTdevice once connect successed
//to start ThreadConnected
private void startThreadConnected(BluetoothSocket socket){

myThreadConnected = new ThreadConnected(socket);
myThreadConnected.start();
}

/*
ThreadConnectBTdevice:
Background Thread to handle BlueTooth connecting
*/
private class ThreadConnectBTdevice extends Thread {

private BluetoothSocket bluetoothSocket = null;
private final BluetoothDevice bluetoothDevice;


private ThreadConnectBTdevice(BluetoothDevice device) {
bluetoothDevice = device;

try {
bluetoothSocket = device.createRfcommSocketToServiceRecord(myUUID);
textStatus.setText("bluetoothSocket: " + bluetoothSocket);
} catch (IOException e) {
// TODO Auto-generated catch block
e.printStackTrace();
}
}

@Override
public void run() {
boolean success = false;
try {
bluetoothSocket.connect();
success = true;
} catch (IOException e) {
e.printStackTrace();

final String eMessage = e.getMessage();
runOnUiThread(new Runnable() {

@Override
public void run() {
textStatus.setText("something wrong bluetoothSocket.connect(): " + eMessage);
}
});

try {
bluetoothSocket.close();
} catch (IOException e1) {
// TODO Auto-generated catch block
e1.printStackTrace();
}
}

if(success){
//connect successful
final String msgconnected = "connect successful: "
+ "BluetoothSocket: " + bluetoothSocket + " "
+ "BluetoothDevice: " + bluetoothDevice;

runOnUiThread(new Runnable() {

@Override
public void run() {
textStatus.setText("");
textByteCnt.setText("");
Toast.makeText(MainActivity.this, msgconnected, Toast.LENGTH_LONG).show();

listViewPairedDevice.setVisibility(View.GONE);
inputPane.setVisibility(View.VISIBLE);
}
});

startThreadConnected(bluetoothSocket);

}else{
//fail
}
}

public void cancel() {

Toast.makeText(getApplicationContext(),
"close bluetoothSocket",
Toast.LENGTH_LONG).show();

try {
bluetoothSocket.close();
} catch (IOException e) {
// TODO Auto-generated catch block
e.printStackTrace();
}

}

}

/*
ThreadConnected:
Background Thread to handle Bluetooth data communication
after connected
*/
private class ThreadConnected extends Thread {
private final BluetoothSocket connectedBluetoothSocket;
private final InputStream connectedInputStream;
private final OutputStream connectedOutputStream;

public ThreadConnected(BluetoothSocket socket) {
connectedBluetoothSocket = socket;
InputStream in = null;
OutputStream out = null;

try {
in = socket.getInputStream();
out = socket.getOutputStream();
} catch (IOException e) {
// TODO Auto-generated catch block
e.printStackTrace();
}

connectedInputStream = in;
connectedOutputStream = out;
}

@Override
public void run() {
byte[] buffer = new byte[1024];
int bytes;

String strRx = "";

while (true) {
try {
bytes = connectedInputStream.read(buffer);
final String strReceived = new String(buffer, 0, bytes);
final String strByteCnt = String.valueOf(bytes) + " bytes received. ";

runOnUiThread(new Runnable(){

@Override
public void run() {
textStatus.append(strReceived);
textByteCnt.append(strByteCnt);
}});

} catch (IOException e) {
// TODO Auto-generated catch block
e.printStackTrace();

final String msgConnectionLost = "Connection lost: "
+ e.getMessage();
runOnUiThread(new Runnable(){

@Override
public void run() {
textStatus.setText(msgConnectionLost);
}});
}
}
}

public void write(byte[] buffer) {
try {
connectedOutputStream.write(buffer);
} catch (IOException e) {
// TODO Auto-generated catch block
e.printStackTrace();
}
}

public void cancel() {
try {
connectedBluetoothSocket.close();
} catch (IOException e) {
// TODO Auto-generated catch block
e.printStackTrace();
}
}
}

}


layout/activity_main.xml
<LinearLayout 

android_layout_width="match_parent"
android_layout_height="match_parent"
android_paddingLeft="@dimen/activity_horizontal_margin"
android_paddingRight="@dimen/activity_horizontal_margin"
android_paddingTop="@dimen/activity_vertical_margin"
android_paddingBottom="@dimen/activity_vertical_margin"
android_orientation="horizontal"
tools_context=".MainActivity">

<LinearLayout
android_layout_width="0dp"
android_layout_height="match_parent"
android_layout_weight="1"
android_orientation="vertical">
<TextView
android_layout_width="wrap_content"
android_layout_height="wrap_content"
android_layout_gravity="center_horizontal"
android_autoLink="web"
android_text="http://android-er.blogspot.com/"
android_textStyle="bold" />

<TextView
android_id="@+id/textbyteCnt"
android_layout_width="wrap_content"
android_layout_height="0dp"
android_layout_weight="1"/>
<TextView
android_id="@+id/status"
android_layout_width="wrap_content"
android_layout_height="0dp"
android_layout_weight="1"/>
</LinearLayout>

<LinearLayout
android_layout_width="0dp"
android_layout_height="match_parent"
android_layout_weight="1"
android_orientation="vertical">

<TextView
android_id="@+id/info"
android_textStyle="bold|italic"
android_layout_width="wrap_content"
android_layout_height="wrap_content"/>
<ListView
android_id="@+id/pairedlist"
android_layout_width="match_parent"
android_layout_height="match_parent"/>

<LinearLayout
android_id="@+id/inputpane"
android_layout_width="match_parent"
android_layout_height="wrap_content"
android_orientation="vertical"
android_visibility="gone">

<EditText
android_id="@+id/input"
android_layout_width="match_parent"
android_layout_height="wrap_content"/>
<Button
android_id="@+id/send"
android_layout_width="match_parent"
android_layout_height="wrap_content"
android_text="Sent"/>
<Button
android_id="@+id/clear"
android_layout_width="match_parent"
android_layout_height="wrap_content"
android_text="Clear"/>

</LinearLayout>

</LinearLayout>

</LinearLayout>


Have to modify AndroidManifest.xml to uses-permission of "android.permission.BLUETOOTH". Refer the exmple "Android example to communicate with Bluetooth device, HC-06 Bluetooth Module".

download filesDownload the files (Android Studio Format) .

download filesDownload and try APK.


For the Arduino side, refer to : Arduino-er - Connect Arduino Due with HC-06 (Bluetooth Module).


This Android App can be used to talk with PC, with FTDI USB-to-Serial adapter connected to HC-06. Refer to the next post "Android Bluetooth connect PC (running Windows10) via HC-06 BT Module and FTDI US-to-Serial adapter".

more:
- Android Bluetooth Terminal to login Raspberry Pi + HC-06

Read More..

Monday, April 4, 2016

Fetching Result from a called activity Android Tutorial for Beginners – Part 5


The next logical step in learning the Android development is to look at how can you call or invoke one activity from another and get back data from the called activity back to the calling activity. For simplicity sake, let us name the first calling activity as parent activity and the invoked activity as the child activity.


For simplicity sake, I use an explicit intent for invoking the child activity. For simple invocation without expecting any data back, we use the method startActivity(). However, when we want a result to be returned by the child activity, we need to call it by the method startActivityForResult(). When the child activity finishes with the job, it should set the data in an intent and call the method setResult(resultcode, intent)to return the data through the intent.


The parent activity should have overridden the method onActivityResult(…)in order to be able to get the data and act upon it.


NOTE: for successful execution of this sequence of events, the child activity should call finish() after setResult(..)in order to give back the handle to the parent activity.


In summary, here are the methods to implement in the parent activity:
  • 1.  startActivtyForResult(..)
  • 2.  onActivityResult(…)

The child Activity should complete the work as usual and finally call:
  • 1.  setResult(…)
  • 2.  finish()

Let us delve into the example downloadable here:


The calling Activity is providing 2 buttons to view books and pens. On selecting one of them, either BooksActivityor PensActivityis called, which displays a list (using ListView) of the selected type of objects. The user can select one and the selected object is returned to the parent for display. (Note: this could be extended into a shopping cart example. I have kept it simple for the tutorial’s sake)


Since we are expecting to get back the selected object, the calling Activity’s code is like this:
     Intent bookIntent = new Intent();                bookIntent.setClass(CallingActivity.this,BooksActivity.class);
      startActivityForResult(bookIntent,BOOK_SELECT);
where BOOK_SELECT is just a constant to help us identify from which child activity the is result obtained, when there is more than 1 child activity, as in this case.


At this point the control is handed over to the BooksActivity. This displays the list of books and the user can scroll through and select a book. When the user selects a book, the selected book needs to be passed back to the CallingActivity. This is how it is done:
      Object o = this.getListAdapter().getItem(position);
      String book = o.toString();
      Intent returnIntent = new Intent();
      returnIntent.putExtra("SelectedBook",book);
      setResult(RESULT_OK,returnIntent);       
      finish();


The first 2 lines show how to get the selected book from the ListView. Then, you create a new intent object, set the selected book as an extra and pass it back through the setResult(…)method call. The result code is set to RESULT_OKsince the job has been successfully done.  After that the finish()method is called to give the control back to the parent activity.


In the parent, the method that gets the control is onActivityResult(…)
protected voidonActivityResult(int requestCode, int resultCode, Intent data)
      {
      switch(requestCode) {
      case BOOK_SELECT:
            if (resultCode == RESULT_OK) {
                String name = data.getStringExtra("SelectedBook");
                Toast.makeText(this, "You have chosen the book: " + " " + name, Toast.LENGTH_LONG).show();
                break;
            }
      ……….
      }
      }  


Here you notice that the BOOK_SELECTconstant is used to act upon the result. If the result code is RESULT_OK, we take the book selected from the “extra” of the intent that is returned from the child activity. data.getStringExtra("SelectedBook") is called to and the name returned is displayed through a Toast. 
Read More..