Showing posts with label 10. Show all posts
Showing posts with label 10. Show all posts
Tuesday, May 10, 2016

Friday, May 6, 2016
Install Android Studio on Ubuntu 15 10 using ubuntu developer tools center
remark:
ubuntu-developer-tools-center is now named Ubuntu Make officially.
Please check the updated "Install Android Studio on 64-bit Ubuntu-GNOME 15.10 with Ubuntu Make".

To install Android Studio on Ubuntu 15.10 using ubuntu-developer-tools-center
- install java (refer "Install Oracle java8 on Ubuntu 15.10 via PPA")
- Enter the command in Terminal:
$ sudo apt-get install ubuntu-developer-tools-center
$ udtc android
This video show installing Android Studio on 64-bit Ubuntu 15.10 (run in VirtualBox) using ubuntu-developer-tools-center.
Tuesday, May 3, 2016
Android Studio Cookbook


About This Book
- See what Material design is about and how to apply it your apps
- Explore the possibilities to develop apps that works on any type of device
- A step-by-step practical guide that will help you build improved applications, change their look, and debug them
This book is for developers that are already familiar with programming concepts and have already started creating apps for the Android platform, for example, by using the Eclipse IDE. It is for developers who intend to use Android Studio as their primary IDE or want to use Android Studio more efficiently.
What You Will Learn
- Develop Android Studio applications using Genymotion
- Apply the concepts of Material design to your applications
- Use memory monitoring tools to tweak performance
- Build applications for Android Wearable
- Capture images, video, or audio within your Android app
- Use content providers to display data
- Build apps with a cloud-based backend
- Create media-related apps that will run on phones, phablets, tablets, and TVs
This book starts with an introduction of Android Studio and why you should use this IDE rather than Eclipse. Moving ahead, it teaches you to build a simple app that requires no backend setup but uses Google Cloud or Parse instead. After that, you will learn how to create an Android app that can send and receive text and images using Google Cloud or Parse as a backend. It explains the concepts of Material design and how to apply them to an Android app. Also, it shows you how to build an app that runs on an Android wear device.
Later, it explains how to build an app that takes advantage of the latest Android SDK while still supporting older Android versions. It also demonstrates how the performance of an app can be improved and how memory management tools that come with the Android Studio IDE can help you achieve this.
By the end of the book, you will be able to develop high quality apps with a minimum amount of effort using the Android Studio IDE.
Style and approach
This is a practical guide full of challenges and many real-world examples that demonstrate interesting development concepts. Besides smartphones and tablets, it also covers Android wearable devices and Android TV. Although strongly recommended, it is not necessary to own any Android device yourself.
Saturday, April 30, 2016
Setup Hardware Devices debugging for Android Studio on Ubuntu 15 10
This video show how to setup /etc/udev/rules.d/51-android.rules in Ubuntu (behind VirtualBox) to enable hardware device debugging in Android Studio.
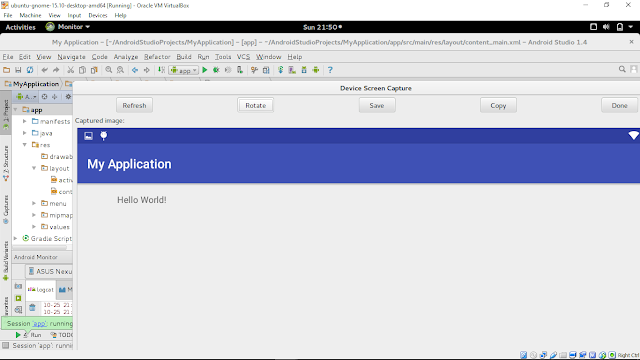
The development platform is 64-bit Ubuntu-GNOME 15.10 running in VirtualBox, with Android Studio installed with Ubuntu Make (umake).
To enable hardware device debugging in Ubuntu, you have to create /etc/udev/rules.d/51-android.rules file to add device IDs for your debugging devices. (refer: Android Developers Document Using Hardware Devices - Setting up a Device for Development)
Create /etc/udev/rules.d/51-android.rules file with sudo right, add the line and save:
Run the command:
$ sudo chmod a+r /etc/udev/rules.d/51-android.rules
This video show how to, behind VirtualBox.
Read More..
The development platform is 64-bit Ubuntu-GNOME 15.10 running in VirtualBox, with Android Studio installed with Ubuntu Make (umake).
To enable hardware device debugging in Ubuntu, you have to create /etc/udev/rules.d/51-android.rules file to add device IDs for your debugging devices. (refer: Android Developers Document Using Hardware Devices - Setting up a Device for Development)
Create /etc/udev/rules.d/51-android.rules file with sudo right, add the line and save:
SUBSYSTEM=="usb", ATTR{idVendor}=="18d1", MODE="0666", GROUP="plugdev"
Run the command:
$ sudo chmod a+r /etc/udev/rules.d/51-android.rules
This video show how to, behind VirtualBox.
Friday, April 8, 2016
FREE MSDN Magazine Windows 10 Special Issue

MSDN Magazine Windows 10 Special Issue, can be READ ONLINE or Download PDF.
Thursday, March 31, 2016
Install Android Studio on 64 bit Ubuntu 15 10 with Ubuntu Make umake
Ubuntu Make is a command line tool which allows you to download the latest version of popular developer tools (include Android Studio) on your installation, installing it longside all the required dependencies (which will only ask for root access if you dont have all the required dependencies installed already), enable multi-arch on your system if you are on a 64 bit machine, integrate it with the Unity launcher… Basically, one command to get your system ready to develop with!
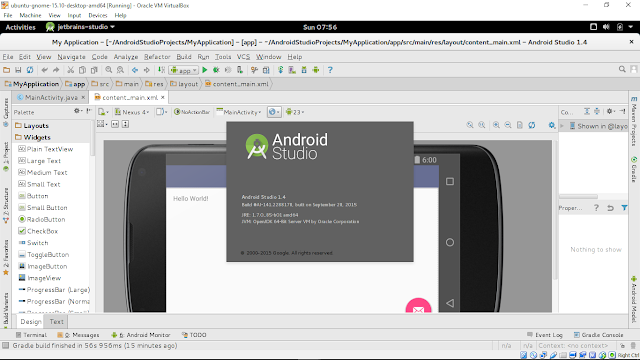
To install Android Studio on Ubuntu:
- Add the Ubuntu Make ppa:
$ sudo add-apt-repository ppa:ubuntu-desktop/ubuntu-make
$ sudo apt-get update
- Install Ubuntu Make:
$ sudo apt-get install ubuntu-make
- Install android-studio:
$ umake android
Once finished, it will also install Java 7 (1.7.0_85 currently) on your system.
This video show how to install Android Studio on 64-bit Ubuntu-GNOME (run on VirtualBox) with Ubuntu Make.
Next:
- Setup Hardware Devices debugging for Android Studio on Ubuntu 15.10
Read More..
To install Android Studio on Ubuntu:
- Add the Ubuntu Make ppa:
$ sudo add-apt-repository ppa:ubuntu-desktop/ubuntu-make
$ sudo apt-get update
- Install Ubuntu Make:
$ sudo apt-get install ubuntu-make
- Install android-studio:
$ umake android
Once finished, it will also install Java 7 (1.7.0_85 currently) on your system.
This video show how to install Android Studio on 64-bit Ubuntu-GNOME (run on VirtualBox) with Ubuntu Make.
Next:
- Setup Hardware Devices debugging for Android Studio on Ubuntu 15.10
Wednesday, March 30, 2016
Android Developers Backstage Episode 10 ART pART 1
Tor and Chet may not know ART, but they know what they like. In this episode, the first in a two-pART series, they talk with Anwar Ghuloum from the ART, or Android Runtime team. ART is the new runtime for Android, which came online in the KitKat release as an alternative to Dalvik. Now ART is not only enabled by default: it’s the only runtime. We’ll talk about what it is, how it works, why it’s better, and the future and very meaning of ART in modern society.
Subscribe to the podcast feed or download the audio file directly.
ARTicles:
Introducing ART: http://source.android.com/devices/tech/dalvik/art.html
Verifying App Behavior: http://developer.android.com/guide/practices/verifying-apps-art.html
Google I/O 2014 Session:
The ART Runtime: https://www.youtube.com/watch?v=EBlTzQsUoOw
Other Resources:
Systrace: http://developer.android.com/tools/help/systrace.html
Tor: google.com/+TorNorbye
Chet: google.com/+ChetHaase
Subscribe to the podcast feed or download the audio file directly.
ARTicles:
Introducing ART: http://source.android.com/devices/tech/dalvik/art.html
Verifying App Behavior: http://developer.android.com/guide/practices/verifying-apps-art.html
Google I/O 2014 Session:
The ART Runtime: https://www.youtube.com/watch?v=EBlTzQsUoOw
Other Resources:
Systrace: http://developer.android.com/tools/help/systrace.html
Tor: google.com/+TorNorbye
Chet: google.com/+ChetHaase
Friday, March 4, 2016
Download Minecraft Pocket Edition 0 10 0 full version android
Minecraft – Pocket Edition game series seemingly very bad practice very addictive and fun pixel graphics, but in practice it is more interesting to Aynbazy with the same graphics and a nice view 4.5 out of 5 has been able to Google Despite Poly rating Price won his $ 7!

In this game you must use your intelligence architecture and the availability of different kinds of devices and construction to the construction of pay Mslah Now, with the buildings the territory of the your own However, note that Privacy This domain may be attacked at any moment and attack. After the construction of a strong and robust materials and their powerful enemies attacked and exotic creatures that will attack you at night and keep safe.
Learning to play the multiplayer quoted Plaza Member:
It can Bazyv play with your friends in one place. I had Mydh.avl one must go to settings and select phone tethering and portable hotspot portable or just connect the dots on his face. Those who approach her ??after the server is connected to WiFi go to the Contact Shn.hala who shared wifi network to a world far away the rest of the world for me to go and the world to blue touched by. Up to
Changes in this version Minecraft – Pocket Edition 0.10.0 ful:
- Minecarts, rails, and powered rails!
- The view distance has been massively increased. Check the options!
- New textures, colours and block functionality taken directly from the PC version
- New blocks: carpets, more wood types, hay bales, iron bars, and more
- New crops and food types: beetroot, carrots, potatoes and pumpkins.
- Lots more blocks and items to use in Creative Mode.
- New AI and breeding.
- A new Creative inventory with tabs.
- Improved lighting and fog effects.
- The view distance has been massively increased. Check the options!
- New textures, colours and block functionality taken directly from the PC version
- New blocks: carpets, more wood types, hay bales, iron bars, and more
- New crops and food types: beetroot, carrots, potatoes and pumpkins.
- Lots more blocks and items to use in Creative Mode.
- New AI and breeding.
- A new Creative inventory with tabs.
- Improved lighting and fog effects.

Wednesday, March 2, 2016
Location Manager Android Developer Tutorial Part 15
Location-based service is another key functionality that gets used by mobile applications. IT is often combined with maps to give a good user experience. We have already see how to use the external Google Maps API in tutorial Part 14. Here I will build upon the same to show how changes in location can be displayed on the map.
The location services are provided in the android.location package.
In order to use location services, our activity needs to implement the LocationManager Interface.
What does a LocationManager provide?
It is through this interface that an application can access the system’s location services. These services basically allow the application to obtain periodic updates of the device’s geographical location. It also helps in firing an application specific intent when the device comes within the proximity of a specified location.
Since in my example I want to simulate a location change and make my activity respond to the same, I am implementing this interface.
In order to make it an effective application, I have shown my location (hard-coded) on the google map. Then, I have used the location manager to handle any change in the location. The change in location needs to be simulated on the emulator by connecting through telnet. How to simulate location change is given at the end of this tutorial.
Now, dive into the code.
NOTE: I am adding the LocationManager implementation to the same MapActivity class created in the earlier tutorial (Part 14) and hence will not be explaining anything related to the maps API here.
Step 1: Obtain the LocationManager instance:
LocationManager lm = (LocationManager) getSystemService(Context.LOCATION_SERVICE);
lm.requestLocationUpdates(LocationManager.GPS_PROVIDER, 1000L, 500.0f, this);
After getting the location manager, I am setting default GPS provider and asking to be notified if the location changes by more than 500 meters from the current location, the frequency of updation being 1 sec.
Step 2:Override the onLocationChanged() method in order to respond to changes in location.
public voidonLocationChanged(Location location) {
if (location != null) {
double lat = location.getLatitude();
double lng = location.getLongitude();
String currentLocation = "The location is changed to Lat: " + lat + " Lng: " + lng;
myLoc.setText(currentLocation);
geoPoint = new GeoPoint((int) lat * 1000000, (int) lng * 1000000);
myMC.animateTo(geoPoint);
}
}
This method gets invoked when we change the location through the telnet connection to the emulator as described at the end of the tutorial. Based on the latitude and the longitude settings sent, the GeoPoint is changed to display the new location.
That is it. I have not overridden any of the other methods provided by the locationManager. Complete code is downloadable here.
How to simulate location change in the emulator?
Start the Emulator from eclipse
Start a command prompt
Start telnet
Then, type, o localhost 5554
This connects the telnet client to the android emulator (assuming emulator is running locally listening on port 5554. Else this connection fails)
Now type
geo fix 79.000000 13.000000 (or your latitude and longitude)
This sends the location change signal to the emulator.
Monday, February 29, 2016
Android example code using ColorFilter

MainActivity.java
package com.blogspot.android_er.androidcolorfilter;

import android.graphics.ColorFilter;
import android.graphics.ColorMatrixColorFilter;
import android.os.Bundle;
import android.support.v7.app.AppCompatActivity;
import android.widget.ImageView;
import android.widget.SeekBar;

public class MainActivity extends AppCompatActivity {

 ImageView imageView;
 SeekBar redBar, greenBar, blueBar;

 @Override
 protected void onCreate(Bundle savedInstanceState) {
 super.onCreate(savedInstanceState);
 setContentView(R.layout.activity_main);

 imageView = (ImageView)findViewById(R.id.iv);
 redBar = (SeekBar)findViewById(R.id.redbar);
 greenBar = (SeekBar)findViewById(R.id.greenbar);
 blueBar = (SeekBar)findViewById(R.id.bluebar);

 redBar.setOnSeekBarChangeListener(colorBarChangeListener);
 greenBar.setOnSeekBarChangeListener(colorBarChangeListener);
 blueBar.setOnSeekBarChangeListener(colorBarChangeListener);

 setColorFilter(imageView);
 }

 SeekBar.OnSeekBarChangeListener colorBarChangeListener
 = new SeekBar.OnSeekBarChangeListener(){

 @Override
 public void onProgressChanged(SeekBar seekBar, int progress, boolean fromUser) {
 setColorFilter(imageView);
 }

 @Override
 public void onStartTrackingTouch(SeekBar seekBar) {

 }

 @Override
 public void onStopTrackingTouch(SeekBar seekBar) {

 }
 };

 private void setColorFilter(ImageView iv){

 /*
 * 5x4 matrix for transforming the color+alpha components of a Bitmap.
 * The matrix is stored in a single array, and its treated as follows:
 * [ a, b, c, d, e,
 * f, g, h, i, j,
 * k, l, m, n, o,
 * p, q, r, s, t ]
 *
 * When applied to a color [r, g, b, a], the resulting color is computed
 * as (after clamping)
 * R = a*R + b*G + c*B + d*A + e;
 * G = f*R + g*G + h*B + i*A + j;
 * B = k*R + l*G + m*B + n*A + o;
 * A = p*R + q*G + r*B + s*A + t;
 */

 float redValue = ((float)redBar.getProgress())/255;
 float greenValue = ((float)greenBar.getProgress())/255;
 float blueValue = ((float)blueBar.getProgress())/255;

 float[] colorMatrix = {
 redValue, 0, 0, 0, 0, //red
 0, greenValue, 0, 0, 0, //green
 0, 0, blueValue, 0, 0, //blue
 0, 0, 0, 1, 0 //alpha
 };

 ColorFilter colorFilter = new ColorMatrixColorFilter(colorMatrix);
 iv.setColorFilter(colorFilter);
 }

}
layout/activity_main.xml
<?xml version="1.0" encoding="utf-8"?>
<LinearLayout


 android_layout_width="match_parent"
 android_layout_height="match_parent"
 android_padding="16dp"
 android_orientation="vertical"
 tools_context=".MainActivity">

 <TextView
 android_layout_width="wrap_content"
 android_layout_height="wrap_content"
 android_layout_gravity="center_horizontal"
 android_autoLink="web"
 android_text="http://android-er.blogspot.com/"
 android_textStyle="bold" />

 <ImageView
 android_id="@+id/iv"
 android_layout_width="wrap_content"
 android_layout_height="wrap_content"
 android_src="@mipmap/ic_launcher"/>

 <SeekBar
 android_id="@+id/redbar"
 android_layout_width="match_parent"
 android_layout_height="wrap_content"
 android_max="255"
 android_progress="255"/>
 <SeekBar
 android_id="@+id/greenbar"
 android_layout_width="match_parent"
 android_layout_height="wrap_content"
 android_max="255"
 android_progress="255"/>
 <SeekBar
 android_id="@+id/bluebar"
 android_layout_width="match_parent"
 android_layout_height="wrap_content"
 android_max="255"
 android_progress="255"/>
</LinearLayout>
Related:
- Convert ImageView to black and white, and set brightness, using ColorFilter
Thursday, February 25, 2016
Download and run Android Studio 2 0 Preview on Windows 10

This video show how to download and run Android Studio 2.0 Preview from Canary Channel?, in parallel with existing installed Android Studio 1.5.
(The Emulator is seem still the old version, not the New Android Emulator)
reference: Android Developers Blog announcement
Related: Install Android Studio 2.0 Preview on Ubuntu Linux, parallel with existing installed Android Studio
Friday, February 19, 2016
socket getInetAddress return null on Android 5
Refer to last example of "Simple HTTP server running on Android", it work on Xiaomi Redmi 2 running Android 4.4.4. But somebody report program stopped on Android 5 devices. So I re-test on Nexus 7 running Android 5.1.1. Yes, the app crash! caused by NullPointerException, because socket.getInetAddress() return null.

Modify MainActivity.java to capture socket.getInetAddress() before and after close():
Its found that on Xiaomi Redmi 2 running Android 4.4.4, socket.getInetAddress() keep no change before and after close().

But on Nexus 7 running Android 5.1.1, change to null after close().

So, we have to read socket.getInetAddress() before close().
Read More..
Modify MainActivity.java to capture socket.getInetAddress() before and after close():
package com.blogspot.android_er.androidhttpserver;

import android.os.Bundle;
import android.support.v7.app.AppCompatActivity;
import android.widget.EditText;
import android.widget.TextView;

import java.io.BufferedReader;
import java.io.IOException;
import java.io.InputStreamReader;
import java.io.PrintWriter;
import java.net.InetAddress;
import java.net.NetworkInterface;
import java.net.ServerSocket;
import java.net.Socket;
import java.net.SocketException;
import java.util.Enumeration;

public class MainActivity extends AppCompatActivity {

 EditText welcomeMsg;
 TextView infoIp;
 TextView infoMsg;
 String msgLog = "";

 ServerSocket httpServerSocket;

 @Override
 protected void onCreate(Bundle savedInstanceState) {
 super.onCreate(savedInstanceState);
 setContentView(R.layout.activity_main);

 welcomeMsg = (EditText) findViewById(R.id.welcomemsg);
 infoIp = (TextView) findViewById(R.id.infoip);
 infoMsg = (TextView) findViewById(R.id.msg);

 infoIp.setText(getIpAddress() + ":"
 + HttpServerThread.HttpServerPORT + " ");

 HttpServerThread httpServerThread = new HttpServerThread();
 httpServerThread.start();
 }

 @Override
 protected void onDestroy() {
 super.onDestroy();

 if (httpServerSocket != null) {
 try {
 httpServerSocket.close();
 } catch (IOException e) {
 e.printStackTrace();
 }
 }
 }

 private String getIpAddress() {
 String ip = "";
 try {
 Enumeration<NetworkInterface> enumNetworkInterfaces = NetworkInterface
 .getNetworkInterfaces();
 while (enumNetworkInterfaces.hasMoreElements()) {
 NetworkInterface networkInterface = enumNetworkInterfaces
 .nextElement();
 Enumeration<InetAddress> enumInetAddress = networkInterface
 .getInetAddresses();
 while (enumInetAddress.hasMoreElements()) {
 InetAddress inetAddress = enumInetAddress.nextElement();

 if (inetAddress.isSiteLocalAddress()) {
 ip += "SiteLocalAddress: "
 + inetAddress.getHostAddress() + " ";
 }

 }

 }

 } catch (SocketException e) {
 // TODO Auto-generated catch block
 e.printStackTrace();
 ip += "Something Wrong! " + e.toString() + " ";
 }

 return ip;
 }

 private class HttpServerThread extends Thread {

 static final int HttpServerPORT = 8888;

 @Override
 public void run() {
 Socket socket = null;

 try {
 httpServerSocket = new ServerSocket(HttpServerPORT);

 while(true){
 socket = httpServerSocket.accept();

 HttpResponseThread httpResponseThread =
 new HttpResponseThread(
 socket,
 welcomeMsg.getText().toString());
 httpResponseThread.start();
 }
 } catch (IOException e) {
 // TODO Auto-generated catch block
 e.printStackTrace();
 }
 }

 }

 private class HttpResponseThread extends Thread {

 Socket socket;
 String h1;

 HttpResponseThread(Socket socket, String msg){
 this.socket = socket;
 h1 = msg;
 }

 @Override
 public void run() {
 BufferedReader is;
 PrintWriter os;
 String request;

 try {
 is = new BufferedReader(new InputStreamReader(socket.getInputStream()));
 request = is.readLine();

 os = new PrintWriter(socket.getOutputStream(), true);

 String response =
 "<html><head></head>" +
 "<body>" +
 "<h1>" + h1 + "</h1>" +
 "</body></html>";

 os.print("HTTP/1.0 200" + " ");
 os.print("Content type: text/html" + " ");
 os.print("Content length: " + response.length() + " ");
 os.print(" ");
 os.print(response + " ");
 os.flush();
 InetAddress clientInetAddressBeforeClose = socket.getInetAddress();
 socket.close();
 InetAddress clientInetAddressAfterClose = socket.getInetAddress();

 msgLog += "Request: " + request + " ";

 if(clientInetAddressBeforeClose == null){
 msgLog += "clientInetAddressBeforeClose == null ";
 }else{
 msgLog += "clientInetAddressBeforeClose = " + clientInetAddressBeforeClose.toString() + " ";
 }

 if(clientInetAddressAfterClose == null){
 msgLog += "clientInetAddressAfterClose == null ";
 }else{
 msgLog += "clientInetAddressAfterClose = " + clientInetAddressAfterClose.toString() + " ";
 }

 MainActivity.this.runOnUiThread(new Runnable() {

 @Override
 public void run() {

 infoMsg.setText(msgLog);
 }
 });

 } catch (IOException e) {
 // TODO Auto-generated catch block
 e.printStackTrace();
 }

 return;
 }
 }
}
Its found that on Xiaomi Redmi 2 running Android 4.4.4, socket.getInetAddress() keep no change before and after close().
But on Nexus 7 running Android 5.1.1, change to null after close().
So, we have to read socket.getInetAddress() before close().
Saturday, February 13, 2016
Doing More with Java Android and Tomcat Edition


This Doing More With book helps you move from introductory Java to more powerful tools and concepts. As you go through the book you get to where you can connect an Android app to a Hibernate/Tomcat server. Unlike many programming books, this one helps you gain all the skills to create mobile connected apps. Using HTTP from Android with JSON, Hibernate, and MySQL a complete JSON Web Service can be created and consumed.
The tone of the book is intended to be light rather than pedantic and hints and tips based on the author’s life experience are included.
Friday, February 12, 2016
Connect HM 10 BLE Module to Android device with BluetoothLeGatt sample project
Android 4.3 (API Level 18) introduces built-in platform support for Bluetooth Low Energy, or called BLE, Bluetooth 4.
HM-10 is a BLE Bluetooth 4.0 Serial Wireless Module. In this test, nothing to do on HM-10, except apply 3.3V on the power pins.

BluetoothLeGatt is a sample demonstrates how to use the Bluetooth LE Generic Attribute Profile (GATT) to transmit arbitrary data between devices.


This video show how to import BluetoothLeGatt sample project in Android Studio, and run on Android device, to scan and connect to HM-10.
Then, we are going to modify something to make the sample app recognize HM-10.

Refer to the post "Test HM-10 Bluetooth 4.0 BLE module with FTDI adapter", the default service UUID and Characteristic of HM-10 are:
- Service UUID: 0xFFE0
- Characteristic: 0xFFE1
Edit SampleGattAttributes.java of BluetoothLeGatt sample to match 0xffe0 and 0xff1, and correct BluetoothLeService.java accordingly. Now, the sample app can recognize HM-10.
This video show how:
SampleGattAttributes.java
BluetoothLeService.java
In the last step in this post, I want to make the BluetoothLeGatt app to receive something from HM-10.

In HM-10 side, FTDI USB-Serial adapter is needed to connect HM-10 to PC via USB/Serial. Such that I can enter something in PC, using Arduino Serial Monitor. Refer Arduino-er: Test HM-10 Bluetooth 4.0 BLE module with FTDI adapter, how to connect PC, FTDI USB-Serial adapter and HM-10.
The original BluetoothLeGatt example target for the Heart Rate Measurement profile. In our demo, we target to receive simple serial data, so modify to by-pass the Heart Rate Measurement profile handling.
Edit broadcastUpdate(final String action, final BluetoothGattCharacteristic characteristic) method of BluetoothLeService.java.
This video show how to:
BluetoothLeService.java
Next:
- Android echo data to Bluetooth LE device, using HM-10 BLE Module
Another BLE Module, AT-09, is compatible to HM-10:
- Modified BluetoothLeGatt sample connect AT-09 (Bluetooth LE Module)
More
- Implement dummy Heart Rate Measurement profile using Arduino Due + HM-10, for BluetoothLeGatt sample code
Read More..
HM-10 is a BLE Bluetooth 4.0 Serial Wireless Module. In this test, nothing to do on HM-10, except apply 3.3V on the power pins.
BluetoothLeGatt is a sample demonstrates how to use the Bluetooth LE Generic Attribute Profile (GATT) to transmit arbitrary data between devices.
This video show how to import BluetoothLeGatt sample project in Android Studio, and run on Android device, to scan and connect to HM-10.
Then, we are going to modify something to make the sample app recognize HM-10.
Refer to the post "Test HM-10 Bluetooth 4.0 BLE module with FTDI adapter", the default service UUID and Characteristic of HM-10 are:
- Service UUID: 0xFFE0
- Characteristic: 0xFFE1
Edit SampleGattAttributes.java of BluetoothLeGatt sample to match 0xffe0 and 0xff1, and correct BluetoothLeService.java accordingly. Now, the sample app can recognize HM-10.
This video show how:
SampleGattAttributes.java
/*
 * Copyright (C) 2013 The Android Open Source Project
 *
 * Licensed under the Apache License, Version 2.0 (the "License");
 * you may not use this file except in compliance with the License.
 * You may obtain a copy of the License at
 *
 * http://www.apache.org/licenses/LICENSE-2.0
 *
 * Unless required by applicable law or agreed to in writing, software
 * distributed under the License is distributed on an "AS IS" BASIS,
 * WITHOUT WARRANTIES OR CONDITIONS OF ANY KIND, either express or implied.
 * See the License for the specific language governing permissions and
 * limitations under the License.
 */

package com.example.android.bluetoothlegatt;

import java.util.HashMap;

/**
 * This class includes a small subset of standard GATT attributes for demonstration purposes.
 */
public class SampleGattAttributes {
 private static HashMap<String, String> attributes = new HashMap();
 public static String HM_10 = "0000ffe1-0000-1000-8000-00805f9b34fb";
 public static String CLIENT_CHARACTERISTIC_CONFIG = "00002902-0000-1000-8000-00805f9b34fb";

 static {
 // Sample Services.
 attributes.put("0000ffe0-0000-1000-8000-00805f9b34fb", "HM-10 Service");
 attributes.put("0000180a-0000-1000-8000-00805f9b34fb", "Device Information Service");
 // Sample Characteristics.
 attributes.put(HM_10, "HM-10 Module");
 attributes.put("00002a29-0000-1000-8000-00805f9b34fb", "Manufacturer Name String");
 }

 public static String lookup(String uuid, String defaultName) {
 String name = attributes.get(uuid);
 return name == null ? defaultName : name;
 }
}
BluetoothLeService.java
 public final static UUID UUID_HEART_RATE_MEASUREMENT =
 UUID.fromString(SampleGattAttributes.HM_10);
In the last step in this post, I want to make the BluetoothLeGatt app to receive something from HM-10.
In HM-10 side, FTDI USB-Serial adapter is needed to connect HM-10 to PC via USB/Serial. Such that I can enter something in PC, using Arduino Serial Monitor. Refer Arduino-er: Test HM-10 Bluetooth 4.0 BLE module with FTDI adapter, how to connect PC, FTDI USB-Serial adapter and HM-10.
The original BluetoothLeGatt example target for the Heart Rate Measurement profile. In our demo, we target to receive simple serial data, so modify to by-pass the Heart Rate Measurement profile handling.
Edit broadcastUpdate(final String action, final BluetoothGattCharacteristic characteristic) method of BluetoothLeService.java.
This video show how to:
BluetoothLeService.java
/*
 * Copyright (C) 2013 The Android Open Source Project
 *
 * Licensed under the Apache License, Version 2.0 (the "License");
 * you may not use this file except in compliance with the License.
 * You may obtain a copy of the License at
 *
 * http://www.apache.org/licenses/LICENSE-2.0
 *
 * Unless required by applicable law or agreed to in writing, software
 * distributed under the License is distributed on an "AS IS" BASIS,
 * WITHOUT WARRANTIES OR CONDITIONS OF ANY KIND, either express or implied.
 * See the License for the specific language governing permissions and
 * limitations under the License.
 */

package com.example.android.bluetoothlegatt;

import android.app.Service;
import android.bluetooth.BluetoothAdapter;
import android.bluetooth.BluetoothDevice;
import android.bluetooth.BluetoothGatt;
import android.bluetooth.BluetoothGattCallback;
import android.bluetooth.BluetoothGattCharacteristic;
import android.bluetooth.BluetoothGattDescriptor;
import android.bluetooth.BluetoothGattService;
import android.bluetooth.BluetoothManager;
import android.bluetooth.BluetoothProfile;
import android.content.Context;
import android.content.Intent;
import android.os.Binder;
import android.os.IBinder;
import android.util.Log;

import java.util.List;
import java.util.UUID;

/**
 * Service for managing connection and data communication with a GATT server hosted on a
 * given Bluetooth LE device.
 */
public class BluetoothLeService extends Service {
 private final static String TAG = BluetoothLeService.class.getSimpleName();

 private BluetoothManager mBluetoothManager;
 private BluetoothAdapter mBluetoothAdapter;
 private String mBluetoothDeviceAddress;
 private BluetoothGatt mBluetoothGatt;
 private int mConnectionState = STATE_DISCONNECTED;

 private static final int STATE_DISCONNECTED = 0;
 private static final int STATE_CONNECTING = 1;
 private static final int STATE_CONNECTED = 2;

 public final static String ACTION_GATT_CONNECTED =
 "com.example.bluetooth.le.ACTION_GATT_CONNECTED";
 public final static String ACTION_GATT_DISCONNECTED =
 "com.example.bluetooth.le.ACTION_GATT_DISCONNECTED";
 public final static String ACTION_GATT_SERVICES_DISCOVERED =
 "com.example.bluetooth.le.ACTION_GATT_SERVICES_DISCOVERED";
 public final static String ACTION_DATA_AVAILABLE =
 "com.example.bluetooth.le.ACTION_DATA_AVAILABLE";
 public final static String EXTRA_DATA =
 "com.example.bluetooth.le.EXTRA_DATA";

 public final static UUID UUID_HEART_RATE_MEASUREMENT =
 UUID.fromString(SampleGattAttributes.HM_10);

 // Implements callback methods for GATT events that the app cares about. For example,
 // connection change and services discovered.
 private final BluetoothGattCallback mGattCallback = new BluetoothGattCallback() {
 @Override
 public void onConnectionStateChange(BluetoothGatt gatt, int status, int newState) {
 String intentAction;
 if (newState == BluetoothProfile.STATE_CONNECTED) {
 intentAction = ACTION_GATT_CONNECTED;
 mConnectionState = STATE_CONNECTED;
 broadcastUpdate(intentAction);
 Log.i(TAG, "Connected to GATT server.");
 // Attempts to discover services after successful connection.
 Log.i(TAG, "Attempting to start service discovery:" +
 mBluetoothGatt.discoverServices());

 } else if (newState == BluetoothProfile.STATE_DISCONNECTED) {
 intentAction = ACTION_GATT_DISCONNECTED;
 mConnectionState = STATE_DISCONNECTED;
 Log.i(TAG, "Disconnected from GATT server.");
 broadcastUpdate(intentAction);
 }
 }

 @Override
 public void onServicesDiscovered(BluetoothGatt gatt, int status) {
 if (status == BluetoothGatt.GATT_SUCCESS) {
 broadcastUpdate(ACTION_GATT_SERVICES_DISCOVERED);
 } else {
 Log.w(TAG, "onServicesDiscovered received: " + status);
 }
 }

 @Override
 public void onCharacteristicRead(BluetoothGatt gatt,
 BluetoothGattCharacteristic characteristic,
 int status) {
 if (status == BluetoothGatt.GATT_SUCCESS) {
 broadcastUpdate(ACTION_DATA_AVAILABLE, characteristic);
 }
 }

 @Override
 public void onCharacteristicChanged(BluetoothGatt gatt,
 BluetoothGattCharacteristic characteristic) {
 broadcastUpdate(ACTION_DATA_AVAILABLE, characteristic);
 }
 };

 private void broadcastUpdate(final String action) {
 final Intent intent = new Intent(action);
 sendBroadcast(intent);
 }

 private void broadcastUpdate(final String action,
 final BluetoothGattCharacteristic characteristic) {
 final Intent intent = new Intent(action);


 /*
 // This is special handling for the Heart Rate Measurement profile. Data parsing is
 // carried out as per profile specifications:
 // http://developer.bluetooth.org/gatt/characteristics/Pages/CharacteristicViewer.aspx?u=org.bluetooth.characteristic.heart_rate_measurement.xml
 if (UUID_HEART_RATE_MEASUREMENT.equals(characteristic.getUuid())) {
 int flag = characteristic.getProperties();
 int format = -1;
 if ((flag & 0x01) != 0) {
 format = BluetoothGattCharacteristic.FORMAT_UINT16;
 Log.d(TAG, "Heart rate format UINT16.");
 } else {
 format = BluetoothGattCharacteristic.FORMAT_UINT8;
 Log.d(TAG, "Heart rate format UINT8.");
 }
 final int heartRate = characteristic.getIntValue(format, 1);
 Log.d(TAG, String.format("Received heart rate: %d", heartRate));
 intent.putExtra(EXTRA_DATA, String.valueOf(heartRate));
 } else {
 // For all other profiles, writes the data formatted in HEX.
 final byte[] data = characteristic.getValue();
 if (data != null && data.length > 0) {
 final StringBuilder stringBuilder = new StringBuilder(data.length);
 for(byte byteChar : data)
 stringBuilder.append(String.format("%02X ", byteChar));
 intent.putExtra(EXTRA_DATA, new String(data) + " " + stringBuilder.toString());
 }
 }
 */

 Log.v("AndroidLE", "broadcastUpdate()");

 final byte[] data = characteristic.getValue();

 Log.v("AndroidLE", "data.length: " + data.length);

 if (data != null && data.length > 0) {
 final StringBuilder stringBuilder = new StringBuilder(data.length);
 for(byte byteChar : data) {
 stringBuilder.append(String.format("%02X ", byteChar));

 Log.v("AndroidLE", String.format("%02X ", byteChar));
 }
 intent.putExtra(EXTRA_DATA, new String(data) + " " + stringBuilder.toString());
 }

 sendBroadcast(intent);
 }

 public class LocalBinder extends Binder {
 BluetoothLeService getService() {
 return BluetoothLeService.this;
 }
 }

 @Override
 public IBinder onBind(Intent intent) {
 return mBinder;
 }

 @Override
 public boolean onUnbind(Intent intent) {
 // After using a given device, you should make sure that BluetoothGatt.close() is called
 // such that resources are cleaned up properly. In this particular example, close() is
 // invoked when the UI is disconnected from the Service.
 close();
 return super.onUnbind(intent);
 }

 private final IBinder mBinder = new LocalBinder();

 /**
 * Initializes a reference to the local Bluetooth adapter.
 *
 * @return Return true if the initialization is successful.
 */
 public boolean initialize() {
 // For API level 18 and above, get a reference to BluetoothAdapter through
 // BluetoothManager.
 if (mBluetoothManager == null) {
 mBluetoothManager = (BluetoothManager) getSystemService(Context.BLUETOOTH_SERVICE);
 if (mBluetoothManager == null) {
 Log.e(TAG, "Unable to initialize BluetoothManager.");
 return false;
 }
 }

 mBluetoothAdapter = mBluetoothManager.getAdapter();
 if (mBluetoothAdapter == null) {
 Log.e(TAG, "Unable to obtain a BluetoothAdapter.");
 return false;
 }

 return true;
 }

 /**
 * Connects to the GATT server hosted on the Bluetooth LE device.
 *
 * @param address The device address of the destination device.
 *
 * @return Return true if the connection is initiated successfully. The connection result
 * is reported asynchronously through the
 * {@code BluetoothGattCallback#onConnectionStateChange(android.bluetooth.BluetoothGatt, int, int)}
 * callback.
 */
 public boolean connect(final String address) {
 if (mBluetoothAdapter == null || address == null) {
 Log.w(TAG, "BluetoothAdapter not initialized or unspecified address.");
 return false;
 }

 // Previously connected device. Try to reconnect.
 if (mBluetoothDeviceAddress != null && address.equals(mBluetoothDeviceAddress)
 && mBluetoothGatt != null) {
 Log.d(TAG, "Trying to use an existing mBluetoothGatt for connection.");
 if (mBluetoothGatt.connect()) {
 mConnectionState = STATE_CONNECTING;
 return true;
 } else {
 return false;
 }
 }

 final BluetoothDevice device = mBluetoothAdapter.getRemoteDevice(address);
 if (device == null) {
 Log.w(TAG, "Device not found. Unable to connect.");
 return false;
 }
 // We want to directly connect to the device, so we are setting the autoConnect
 // parameter to false.
 mBluetoothGatt = device.connectGatt(this, false, mGattCallback);
 Log.d(TAG, "Trying to create a new connection.");
 mBluetoothDeviceAddress = address;
 mConnectionState = STATE_CONNECTING;
 return true;
 }

 /**
 * Disconnects an existing connection or cancel a pending connection. The disconnection result
 * is reported asynchronously through the
 * {@code BluetoothGattCallback#onConnectionStateChange(android.bluetooth.BluetoothGatt, int, int)}
 * callback.
 */
 public void disconnect() {
 if (mBluetoothAdapter == null || mBluetoothGatt == null) {
 Log.w(TAG, "BluetoothAdapter not initialized");
 return;
 }
 mBluetoothGatt.disconnect();
 }

 /**
 * After using a given BLE device, the app must call this method to ensure resources are
 * released properly.
 */
 public void close() {
 if (mBluetoothGatt == null) {
 return;
 }
 mBluetoothGatt.close();
 mBluetoothGatt = null;
 }

 /**
 * Request a read on a given {@code BluetoothGattCharacteristic}. The read result is reported
 * asynchronously through the {@code BluetoothGattCallback#onCharacteristicRead(android.bluetooth.BluetoothGatt, android.bluetooth.BluetoothGattCharacteristic, int)}
 * callback.
 *
 * @param characteristic The characteristic to read from.
 */
 public void readCharacteristic(BluetoothGattCharacteristic characteristic) {
 if (mBluetoothAdapter == null || mBluetoothGatt == null) {
 Log.w(TAG, "BluetoothAdapter not initialized");
 return;
 }
 mBluetoothGatt.readCharacteristic(characteristic);
 }

 /**
 * Enables or disables notification on a give characteristic.
 *
 * @param characteristic Characteristic to act on.
 * @param enabled If true, enable notification. False otherwise.
 */
 public void setCharacteristicNotification(BluetoothGattCharacteristic characteristic,
 boolean enabled) {
 if (mBluetoothAdapter == null || mBluetoothGatt == null) {
 Log.w(TAG, "BluetoothAdapter not initialized");
 return;
 }
 mBluetoothGatt.setCharacteristicNotification(characteristic, enabled);

 // This is specific to Heart Rate Measurement.
 if (UUID_HEART_RATE_MEASUREMENT.equals(characteristic.getUuid())) {
 BluetoothGattDescriptor descriptor = characteristic.getDescriptor(
 UUID.fromString(SampleGattAttributes.CLIENT_CHARACTERISTIC_CONFIG));
 descriptor.setValue(BluetoothGattDescriptor.ENABLE_NOTIFICATION_VALUE);
 mBluetoothGatt.writeDescriptor(descriptor);
 }
 }

 /**
 * Retrieves a list of supported GATT services on the connected device. This should be
 * invoked only after {@code BluetoothGatt#discoverServices()} completes successfully.
 *
 * @return A {@code List} of supported services.
 */
 public List<BluetoothGattService> getSupportedGattServices() {
 if (mBluetoothGatt == null) return null;

 return mBluetoothGatt.getServices();
 }
}
Next:
- Android echo data to Bluetooth LE device, using HM-10 BLE Module
Another BLE Module, AT-09, is compatible to HM-10:
- Modified BluetoothLeGatt sample connect AT-09 (Bluetooth LE Module)
More
- Implement dummy Heart Rate Measurement profile using Arduino Due + HM-10, for BluetoothLeGatt sample code
Monday, February 8, 2016
OpenCV Android Programming By Example


About This Book
- This is the most up-to-date book on OpenCV Android programming on the market at the moment. There is no direct competition for our title.
- Based on a technology that is increasing in popularity, proven by activity in forums related to this topic.
- This book uniquely covers applications such as the Panoramic viewer and Automatic Selfie, among others.
If you are an Android developer and want to know how to implement vision-aware applications using OpenCV, then this book is definitely for you.
It would be very helpful if you understand the basics of image processing and computer vision, but no prior experience is required
What You Will Learn
- Identify and install all the elements needed to start building vision-aware Android applications
- Explore image representation, colored and gray scale
- Recognize and apply convolution operations and filtering to deal with noisy data
- Use different shape analysis techniques
- Extract and identify interest points in an image
- Understand and perform object detection
- Run native computer vision algorithms and gain performance boosts
Starting from the basics of computer vision and OpenCV, well take you all the way to creating exciting applications. You will discover that, though computer vision is a challenging subject, the ideas and algorithms used are simple and intuitive, and you will appreciate the abstraction layer that OpenCV uses to do the heavy lifting for you. Packed with many examples, the book will help you understand the main data structures used within OpenCV, and how you can use them to gain performance boosts. Next we will discuss and use several image processing algorithms such as histogram equalization, filters, and color space conversion. You then will learn about image gradients and how they are used in many shape analysis techniques such as edge detection, Hough Line Transform, and Hough Circle Transform. In addition to using shape analysis to find things in images, you will learn how to describe objects in images in a more robust way using different feature detectors and descriptors.
By the end of this book, you will be able to make intelligent decisions using the famous Adaboost learning algorithm.
Style and approach
An easy-to-follow tutorial packed with hands-on examples. Each topic is explained and placed in context, and the book supplies full details of the concepts used for added proficiency.
Tuesday, March 11, 2014
10 things you probably didnt know about App Engine
What could be better than nine nifty tips and tricks about App Engine? Why, ten of course. As weve been participating in the discussion groups, weve noticed that some features of App Engine often go unnoticed so weve come up with just under eleven fun facts which might just change the way that you develop your app. Without further ado, bring on the first tip:
1. App Versions are strings, not numbers
Although most of the examples show the version field in app.yaml and appengine-web.xml as a number, thats just a matter of convention. App versions can be any string thats allowed in a URL. For example, you could call your versions "live" and "dev", and they would be accessible at "live.latest.yourapp.appspot.com" and "dev.latest.yourapp.appspot.com".
2. You can have multiple versions of your app running simultaneously
As we alluded to in point 1, App Engine permits you to deploy multiple versions of your app and have them running side-by-side. All the versions share the samedatastore and memcache, but they run in separate instances and have different URLs. Your live version always serves off yourapp.appspot.com as well as any domains you have mapped, but all your apps versions are accessible at version.latest.yourapp.appspot.com. Multiple versions are particularly useful for testing a new release in a production environment, on real data, before making it available to all your users.
Something thats less known is that the different app versions dont even have to have the same runtime! Its perfectly fine to have one version of an app using the Java runtime and another version of the same app using the Python runtime.
3. The Java runtime supports any language that compiles to Java bytecode
Its called the Java runtime, but in fact theres nothing stopping you from writing your App Engine app in any other language that compiles to JVM bytecode. In fact, there are already people writing App Engine apps in JRuby, Groovy, Scala, Rhino (a JavaScript interpreter), Quercus (a PHP interpreter/compiler), and even Jython! Our community has shared notes on what theyve found to work and not work on the following wiki page.
4. The IN and != operators generate multiple datastore queries under the hood
The IN and != operators in the Python runtime are actually implemented in the SDK and translate to multiple queries under the hood.
For example, the query "SELECT * FROM People WHERE name IN (Bob, Jane)" gets translated into two queries, equivalent to running "SELECT * FROM People WHERE name = Bob" and "SELECT * FROM People WHERE name = Jane" and merging the results. Combining multiple disjunctions multiplies the number of queries needed, so the query "SELECT * FROM People WHERE name IN (Bob, Jane) AND age != 25" generates a total of four queries, for each of the possible conditions (age less than or greater than 25, and name is Bob or Jane), then merges them together into a single result set.
The upshot of this is that you should avoid using excessively large disjunctions. If youre using an inequality query, for example, and you expect only a small number of records to exactly match the condition (e.g. in the above example, you know very few people will have an age of exactly 25), it may be more efficient to execute the query without the inequality filter and exclude any returned records that dont match it yourself.
5. You can batch put, get and delete operations for efficiency
Every time you make a datastore request, such as a query or a get() operation, your app has to send the request off to the datastore, which processes the request and sends back a response. This request-response cycle takes time, and if youre doing a lot of operations one after the other, this can add up to a substantial delay in how long your users have to wait to see a result.
Fortunately, theres an easy way to reduce the number of round trips: batch operations. The db.put(), db.get(), and db.delete() functions all accept lists in addition to their more usual singular invocation. When passed a list, they perform the operation on all the items in the list in a singledatastore round trip and they are executed in parallel, saving you a lot of time. For example, take a look at this common pattern:
for entity in MyModel.all().filter("color =",
    old_favorite).fetch(100):
  entity.color = new_favorite
  entity.put()
Doing the update this way requires one datastore round trip for the query, plus one additional round trip for each updated entity - for a total of up to 101 round trips! In comparison, take a look at this example:
updated = []
for entity in MyModel.all().filter("color =",
    old_favorite).fetch(100):
  entity.color = new_favorite
  updated.append(entity)
db.put(updated)
By adding two lines, weve reduced the number of round trips required from 101 to just 2!
6. Datastore performance doesnt depend on how many entities you have
Many people ask about how the datastore will perform once theyve inserted 100,000, or a million, or ten million entities. One of the datastores major strengths is that its performance is totally independent of the number of entities your app has. So much so, in fact, that every entity for every App Engine app is stored in a singleBigTable table! Further, when it comes to queries, all the queries that you can execute natively (with the notable exception of those involving IN and != operators - see above) have equivalent execution cost: The cost of running a query is proportional to the number of results returned by that query.
7. The time it takes to build an index isnt entirely dependent on its size
When adding a new index to your app on App Engine, it sometimes takes a significant amount of time to build. People often inquire about this, citing the amount of data they have compared to the time taken. However, requests to build new indexes are actually added to a queue of indexes that need to be built, and processed by a centralized system that builds indexes for all App Engine apps. At peak times, there may be other index building jobs ahead of yours in the queue, delaying when we can start building your index.
8. The value for Stored Data is updated once a day
Once a day, we run a task to recalculate the Stored Data figure for your app based on your actual datastore usage at that time. In the intervening period, we update the figure with an estimate of your usage so we can give you immediate feedback on changes in your usage. This explains why many people have observed that after deleting a large number of entities, theirdatastore usage remains at previous levels for a while. For billing purposes, only the authoritative number is used, naturally.
9. The order that handlers in app.yaml, web.xml, and appengine-web.xml are specified in matters
One of the more common and subtle mistakes people make when configuring their app is to forget that handlers in the application configuration files are processed in order, from top to bottom. For example, when installing remote_api, many people do the following:
handlers:
- url: /.*
  script: request.py

- url: /remote_api
  script: $PYTHON_LIB/google/appengine/ext/remote_api/handler.py
  login: admin
The above looks fine at first glance, but because handlers are processed in order, the handler for request.py is encountered first, and all requests - even those for remote_api - get handled by request.py. Since request.py doesnt know about remote_api, it returns a 404 Not Found error. The solution is simple: Make sure that the catchall handler comes after all other handlers.
The same is true for the Java runtime, with the additional constraint that all the static file handlers in appengine-web.xml are processed before any of the dynamic handlers in web.xml.
10. You dont need to construct GQL strings by hand
One anti-pattern that comes up a lot looks similar to this:
q = db.GqlQuery("SELECT * FROM People "
    "WHERE first_name = " + first_name
    + " AND last_name = " + last_name + "")
As well as opening up your code to injection vulnerabilities, this practice introduces escaping issues (what if a user has an apostrophe in their name?) and potentially, encoding issues. Fortunately,GqlQuery has built in support for parameter substitution, a common technique for avoiding the need to substitute in strings in the first place. Using parameter substitution, the above query can be rephrased like this:
q = db.GqlQuery("SELECT * FROM People "
    "WHERE first_name = :1 "
    "AND last_name = :2", first_name, last_name)
GqlQuery also supports using named instead of numbered parameters, and passing a dictionary as an argument:
q = db.GqlQuery("SELECT * FROM People "
    "WHERE first_name = :first_name "
    "AND last_name = :last_name",
    first_name=first_name, last_name=last_name)
Aside from cleaning up your code, this also allows for some neat optimizations. If youre going to execute the same query multiple times with different values, you can useGqlQuery .bind() to rebind the values of the parameters for each query. This is faster than constructing a new query each time, because the query only has to be parsed once:
q = db.GqlQuery("SELECT * FROM People "
    "WHERE first_name = :first_name "
    "AND last_name = :last_name")
for first, last in people:
  q.bind(first, last)
  person = q.get()
print personJava is a trademark or registered trademark of Sun Microsystems, Inc. in the United States and other countries.
Monday, March 10, 2014
BlackBerry 10 review

TechRadar rating
/5
For
- Good messaging hub
- Excellent web browser
- Fluid interface
Against
- Can seem confusing
- Lack of killer apps
- No stand out features
BB10 has had its first major update, but is it any better?
After a number of delays and setbacks BlackBerry 10 finally arrived in January and BlackBerrys new mobile platform has already witnessed its major first update in its life cycle with BlackBerry 10.1 now available on all three BB10 devices.Weve explored the new version of the operating system and have updated our BlackBerry 10 review accordingly - you lucky, lucky people.
The BlackBerry Z10 kicked off the Canadian firms renewed onslaught on the mobile market, but it has since been joined by the QWERTY keyboard toting BlackBerry Q10 and more recently the budget focused BlackBerry Q5.
While in the short term focus will be put on the devices its the software the handsets are running that is really the key to BlackBerrys long term success, or ultimate demise.
The BlackBerry smartphone range has been in desperate need of a reboot for a while as the likes of iOS 6, Android Jelly Bean and Windows Phone 8 have outstripped the extremely outdated BB OS7 platform.
Whereas the other systems have witnessed incremental upgrades, BB 10 is a totally new offering – the BB OS7 base has been completely scrapped and the new platform rebuilt from the ground up.
BB10 sees the implementation of a whole new user interface, doing away with the familiar BlackBerry system were all used to in favour of something that resembles the likes of Android and iOS, although with its own unique features thrown in for good measure.
BlackBerry 10 has merged homescreens, widgets, app lists and a unified inbox into one slick interface, offering up an easy-to-navigate user experience.
Lock screen

The first thing youre greeted with on BlackBerry 10 is the lock screen, which not only shows the time and date, but also notifications, unread messages and upcoming calendar events.
Theres a button to launch the camera straight from the lock screen to grab a quick snap, just hold down on the icon for three of seconds.
Its slightly longer than wed like and the simple slide action on some Android handsets is quicker.
To unlock a touchscreen BB 10 handset you need to slide your finger up the screen. As you do, the homescreen below will begin to appear, giving you a sneak peek of whats underneath.
What you cant do from the lockscreen is jump straight into a new message, email or other notification. Instead you have to unlock the handset in the normal way and then slide into the BlackBerry Hub.
Its not a huge issue but its something wed like to see crop up in a future update as it will further enhance the fluidity of BB 10.
When viewing the lock screen you can drag down from the top of the display to show the night time clock mode - which has a lovely analogue clock face and a toggle for your alarm.
The black background and red highlights mean when you check the time in the middle of the night you wont be blinded by a bright display, which is always a bonus.
Homescreen
The main BlackBerry 10 homescreen is comprised of Active Frames, technically mini-applications, which give you an overview of information from a particular app and launch the full version when tapped.
BB10 will display up to eight of these active frames, showing your most recently used apps with the latest app appearing in the top-left position.
Only four of these panes can fit on the screen at one time, so youll need to scroll down to see the rest – which all seems a little pointless, since you can just as quickly swipe sideways to access the app list and launch the app you want from there.
For those of you who may be concerned that these Active Frames could be both data and battery-intensive, BlackBerry assures us that this is not the case, with the QNX core of BlackBerry 10 providing efficient power management, and the frames only downloading the minimum amount of data required for them to update.
To be fair weve seen pretty good battery life from both the BlackBerry Z10 and Q10 during our in-depth review process, so were inclined to believe BlackBerrys claims.

If you get fed up of seeing a particular frame then you can easily close it by hitting the small cross in the bottom right corner and if you close all the panes youll be taken by default to the first page in the app list until you open another.
When youre in an app theres no back button on screen to help you exit. This brings us to another key feature of BB10, as it encourages you to use a gesture to quit applications by running your finger up from the bottom of the screen, returning you to the active frame view.
While this is easy to do on the Z10 and Q5 its a little trickier with the Q10 which doesnt provide any additional space between the bottom of the display and its QWERTY keyboard.
Those who are already familiar with other smartphones will find the action pretty unnatural and it takes a while to get used to the new way of doing things on BlackBerry 10.
Read the rest of this post --->

