Pages

Showing posts with label for. Show all posts

Saturday, May 14, 2016

Android Text Controls

Text controls include:

1. TextView.

2. EditText

3. AutoCompleteEditText

4. MultiCompleteTextView

TextView
The TextView represent an un-editable text. It resembles the Label control in C# or ASP.NET but it has an interesting feature which is the ability to highlight the text if its is an URL, an e-mail or a phone number so that when the user clicks on the textview the default intent whether it is the web browser or the dialer launches
<?xml version="1.0" encoding="utf-8"?>
<LinearLayout
android_orientation="vertical"
android_layout_width="fill_parent"
android_layout_height="fill_parent"
>
<TextView
android_layout_width="fill_parent"
android_layout_height="wrap_content"
android_text="Visit Http://www.android-pro.blogspot.com"
android_autoLink="web"
android_id="@+id/txtURL"
/>

<TextView
android_layout_width="fill_parent"
android_layout_height="wrap_content"
android_text="Dial 1 650-253-0000"
android_autoLink="all"
/>
</LinearLayout>


you can see that the TextViews containing URLs or Phone numbers are highlighted, and when the user presses on them the default intent (the browser or the dialer launches)


this is done by using the property android:autoLink which can have the values:
web, email ,phone, map
or
All
this can be achieved from code by using the following code:
TextView txtURL=(TextView)findViewById(R.id.txtURL);
Linkify.addLinks(txtURL, Linkify.ALL);

EditText
The EditText is a subclass of the TextView it is like the TextBox in C#. it enables users to edit text.


We can use the autoText property to make the EditText to correct the common spelling mistakes.

<?xml version="1.0" encoding="utf-8"?>
<LinearLayout
android_orientation="vertical"
android_layout_width="fill_parent"
android_layout_height="fill_parent"
>
<EditText
android:layout_width="fill_parent"
android:layout_height="wrap_content"
android:autoText="true"

/>
</LinearLayout>


We can use the capitalize property to make the text capitalized like this:
<LinearLayout 
android_orientation="vertical"
android_layout_width="fill_parent"
android_layout_height="fill_parent"
>

<EditText
android:layout_width="fill_parent"
android:layout_height="wrap_content"
android:capitalize="characters"

/>
<EditText
android:layout_width="fill_parent"
android:layout_height="wrap_content"
android:capitalize="none"
/>
<EditText
android:layout_width="fill_parent"
android:layout_height="wrap_content"
android:capitalize="words"
/>
</LinearLayout>


we can use the password property to make the control accepts phone numbers input:
<?xml version="1.0" encoding="utf-8"?>
<LinearLayout
android_orientation="vertical"
android_layout_width="fill_parent"
android_layout_height="fill_parent"
>

<EditText
android:layout_width="fill_parent"
android:layout_height="wrap_content"
android:password="true"

/>

</LinearLayout>


We can enforce the Control to wrap all the text in a single line by setting android:singleLine property to true.

AutoCompleteTextView
The autoCompleteTextView is an EditText with auto complete functionality. The auto complete functionality can be achieved by attaching an Adapter with the auto complete values to the control like this:
<?xml version="1.0" encoding="utf-8"?>
<LinearLayout
android_orientation="vertical"
android_layout_width="fill_parent"
android_layout_height="fill_parent"
>

<AutoCompleteTextView
android:layout_width="fill_parent"
android:layout_height="wrap_content"
android:id="@+id/act"

/>

</LinearLayout>


Then attach the adapter from the code like this:
AutoCompleteTextView act=(AutoCompleteTextView)findViewById(R.id.act);
ArrayAdapter arr=new ArrayAdapter(this,android.R.layout.simple_dropdown_item_1line,new String []{"Hello","Hi","Alloha"});
act.setAdapter(arr);

in a search program for example you can obtain the auto complete words from a web service and populate the adapter with these words.

MultiAutoCompleteTextView

The AutoCompleteTextView can suggest auto complete for the entire text in the control, meaning that if you type more than one word it would try to match the whole sentence not the single words.
The MultiAutoCompleteTextView works the same way as the AutoCompleteTextView except you can add a Tokenizer that parses the text and allows you to suggest where to start suggesting words like this:
<?xml version="1.0" encoding="utf-8"?>
<LinearLayout
android_orientation="vertical"
android_layout_width="fill_parent"
android_layout_height="fill_parent"
>

<MultiAutoCompleteTextView
android:layout_width="fill_parent"
android:layout_height="wrap_content"
android:id="@+id/act"

/>

</LinearLayout>


then from code:
MultiAutoCompleteTextView mact=(MultiAutoCompleteTextView)findViewById(R.id.act);
ArrayAdapter arr=new ArrayAdapter(this,android.R.layout.simple_dropdown_item_1line,new String []{"Hello","Hi","Alloha"});
mact.setAdapter(arr);
mact.setTokenizer(new MultiAutoCompleteTextView.CommaTokenizer());

The tokenizer tells the control to start suggesting for words separated by a comma.
Read More..

Friday, May 13, 2016

Galaxy on Fire 2 Full HD Cracked Valkyrie for ANDROID

DOWNLOAD Galaxy on Fire 2 Full HD Valkyrie for ANDROID


Klik video diatas untuk melihat trailernya.


Full Cracked Version!

Pastikan anda tersambung dengan internet saat menginstall game ini di Android anda!
Wi-Fi recommended!


Read More..

Plague Inc MOD for Android

Plague Inc MOD for Android


Can you infect the world? Plague Inc. is a unique mix of high strategy and terrifyingly realistic simulation.

Your pathogen has just infected 'Patient Zero'. Now you must bring about the end of human history by evolving a deadly, global Plague whilst adapting against everything humanity can do to defend itself.

Read More..

Thursday, May 12, 2016

Temple Run 2 Unlimited Coins Gems Unlocked Android Game Moded


Salam Blogger :) 
Holaa semua, Selamat malam :D . tumben kan ucapin selamat malam. haha. nah ini ada game request an lagi nih, nama Game nya Temple run 2. yap game ini sangat populer di kalangan gamers android. karena game ini controlnya simple, tp susah utk di maenin. disini kita bisa memilih banyak char. setiap char punya kemampuan beda, dan bisa diupgrade demi kesuksesan kalian berlari. oke cek it.. 

Details Game: 
Name      : Temple Run 2 
Genre      : Action
Platform  : Android 
Requires  : Android 4.0  and up

Modification on Game: 
- Unlimited Coins & Gems
- Unlocked All char

Review Modif:

Screenshoot:


Tutorial Instal : 
1. Download game. 
2. Pindahkan Game ke Androidmu.
3. Uniinstal Version originalnya, jika ada.
4. Instal MOD apk & Play
5. Enjoyyy 


|DOWNLOAD|
{Ver.1.16}
Temple Run 2 - Unlimited Coins&Gems,Unlocked[Android Game : Moded]

|Download Original game|
On Playstore


#Salam Blogger
#Semoga bermanfaat :)
#Ask? comment :) 
Read More..

Update Twitter v4 0 3 For Android Terbaru

Read More..

Android NFC readBlock for MifareClassic to dump data in RFID tag


Last example "Android NFC read MifareClassic RFID tag, with android.nfc.action.TECH_DISCOVERED" read some general info of the RFID tag; such as type, size... This example dump the data inside the tag by calling readBlock() of MifareClassic.

Test on bland new MifareClassic RFID Card and Key.
(Android Studio project and signed APK are available on bottom of this post, you can test on your Android devices)


MifareClassic.readBlock() is an I/O operation and will block until complete. It must not be called from the main application thread. So we have to implement our AsyncTask to perform in background thread.

Modify MainActivity.java in last example:
package com.blogspot.android_er.androidnfctechdiscovered;

import android.content.Intent;
import android.nfc.NfcAdapter;
import android.nfc.Tag;
import android.nfc.tech.MifareClassic;
import android.os.AsyncTask;
import android.os.Bundle;
import android.support.v7.app.AppCompatActivity;
import android.widget.TextView;
import android.widget.Toast;

import java.io.IOException;

public class MainActivity extends AppCompatActivity {

private NfcAdapter nfcAdapter;
TextView textViewInfo, textViewTagInfo, textViewBlock;

@Override
protected void onCreate(Bundle savedInstanceState) {
super.onCreate(savedInstanceState);
setContentView(R.layout.activity_main);
textViewInfo = (TextView)findViewById(R.id.info);
textViewTagInfo = (TextView)findViewById(R.id.taginfo);
textViewBlock = (TextView)findViewById(R.id.block);

nfcAdapter = NfcAdapter.getDefaultAdapter(this);
if(nfcAdapter == null){
Toast.makeText(this,
"NFC NOT supported on this devices!",
Toast.LENGTH_LONG).show();
finish();
}else if(!nfcAdapter.isEnabled()){
Toast.makeText(this,
"NFC NOT Enabled!",
Toast.LENGTH_LONG).show();
finish();
}
}

@Override
protected void onResume() {
super.onResume();

Intent intent = getIntent();
String action = intent.getAction();

if (NfcAdapter.ACTION_TECH_DISCOVERED.equals(action)) {
Toast.makeText(this,
"onResume() - ACTION_TECH_DISCOVERED",
Toast.LENGTH_SHORT).show();

Tag tag = intent.getParcelableExtra(NfcAdapter.EXTRA_TAG);
if(tag == null){
textViewInfo.setText("tag == null");
}else{
String tagInfo = tag.toString() + " ";

tagInfo += " Tag Id: ";
byte[] tagId = tag.getId();
tagInfo += "length = " + tagId.length +" ";
for(int i=0; i<tagId.length; i++){
tagInfo += String.format("%02X", tagId[i] & 0xff) + " ";
}
tagInfo += " ";

String[] techList = tag.getTechList();
tagInfo += " Tech List ";
tagInfo += "length = " + techList.length +" ";
for(int i=0; i<techList.length; i++){
tagInfo += techList[i] + " ";
}

textViewInfo.setText(tagInfo);

//Only android.nfc.tech.MifareClassic specified in nfc_tech_filter.xml,
//so must be MifareClassic
readMifareClassic(tag);
}
}else{
Toast.makeText(this,
"onResume() : " + action,
Toast.LENGTH_SHORT).show();
}
}

public void readMifareClassic(Tag tag){
MifareClassic mifareClassicTag = MifareClassic.get(tag);

String typeInfoString = "--- MifareClassic tag --- ";
int type = mifareClassicTag.getType();
switch(type){
case MifareClassic.TYPE_PLUS:
typeInfoString += "MifareClassic.TYPE_PLUS ";
break;
case MifareClassic.TYPE_PRO:
typeInfoString += "MifareClassic.TYPE_PRO ";
break;
case MifareClassic.TYPE_CLASSIC:
typeInfoString += "MifareClassic.TYPE_CLASSIC ";
break;
case MifareClassic.TYPE_UNKNOWN:
typeInfoString += "MifareClassic.TYPE_UNKNOWN ";
break;
default:
typeInfoString += "unknown...! ";
}

int size = mifareClassicTag.getSize();
switch(size){
case MifareClassic.SIZE_1K:
typeInfoString += "MifareClassic.SIZE_1K ";
break;
case MifareClassic.SIZE_2K:
typeInfoString += "MifareClassic.SIZE_2K ";
break;
case MifareClassic.SIZE_4K:
typeInfoString += "MifareClassic.SIZE_4K ";
break;
case MifareClassic.SIZE_MINI:
typeInfoString += "MifareClassic.SIZE_MINI ";
break;
default:
typeInfoString += "unknown size...! ";
}

int blockCount = mifareClassicTag.getBlockCount();
typeInfoString += "BlockCount = " + blockCount + " ";
int sectorCount = mifareClassicTag.getSectorCount();
typeInfoString += "SectorCount = " + sectorCount + " ";

textViewTagInfo.setText(typeInfoString);

new ReadMifareClassicTask(mifareClassicTag).execute();

}

private class ReadMifareClassicTask extends AsyncTask<Void, Void, Void> {

/*
MIFARE Classic tags are divided into sectors, and each sector is sub-divided into blocks.
Block size is always 16 bytes (BLOCK_SIZE). Sector size varies.
MIFARE Classic 1k are 1024 bytes (SIZE_1K), with 16 sectors each of 4 blocks.
*/

MifareClassic taskTag;
int numOfBlock;
final int FIX_SECTOR_COUNT = 16;
boolean success;
final int numOfSector = 16;
final int numOfBlockInSector = 4;
byte[][][] buffer = new byte[numOfSector][numOfBlockInSector][MifareClassic.BLOCK_SIZE];

ReadMifareClassicTask(MifareClassic tag){
taskTag = tag;
success = false;
}

@Override
protected void onPreExecute() {
textViewBlock.setText("Reading Tag, dont remove it!");
}

@Override
protected Void doInBackground(Void... params) {

try {
taskTag.connect();

for(int s=0; s<numOfSector; s++){
if(taskTag.authenticateSectorWithKeyA(s, MifareClassic.KEY_DEFAULT)) {
for(int b=0; b<numOfBlockInSector; b++){
int blockIndex = (s * numOfBlockInSector) + b;
buffer[s][b] = taskTag.readBlock(blockIndex);
}
}
}

success = true;
} catch (IOException e) {
e.printStackTrace();
} finally{
if(taskTag!=null){
try {
taskTag.close();
} catch (IOException e) {
e.printStackTrace();
}
}
}

return null;
}

@Override
protected void onPostExecute(Void aVoid) {
//display block
if(success){
String stringBlock = "";
for(int i=0; i<numOfSector; i++){
stringBlock += i + " : ";
for(int j=0; j<numOfBlockInSector; j++){
for(int k=0; k<MifareClassic.BLOCK_SIZE; k++){
stringBlock += String.format("%02X", buffer[i][j][k] & 0xff) + " ";
}
stringBlock += " ";
}
stringBlock += " ";
}
textViewBlock.setText(stringBlock);
}else{
textViewBlock.setText("Fail to read Blocks!!!");
}
}
}
}


layout/activity_main.xml
<?xml version="1.0" encoding="utf-8"?>
<LinearLayout


android_layout_width="match_parent"
android_layout_height="match_parent"
android_padding="16dp"
android_orientation="horizontal"
tools_context=".MainActivity">

<LinearLayout
android_layout_width="0dp"
android_layout_height="match_parent"
android_layout_weight="1"
android_orientation="vertical">

<TextView
android_layout_width="wrap_content"
android_layout_height="wrap_content"
android_layout_margin="10dp"
android_layout_gravity="center_horizontal"
android_autoLink="web"
android_text="http://android-er.blogspot.com/"
android_textStyle="bold"/>

<TextView
android_id="@+id/info"
android_layout_width="match_parent"
android_layout_height="wrap_content"
android_textStyle="italic"/>

<TextView
android_id="@+id/taginfo"
android_layout_width="match_parent"
android_layout_height="wrap_content"
android_textStyle="bold"/>

</LinearLayout>

<ScrollView
android_layout_width="0dp"
android_layout_height="match_parent"
android_layout_weight="1">
<TextView
android_id="@+id/block"
android_layout_width="match_parent"
android_layout_height="wrap_content"
android_typeface="monospace"/>
</ScrollView>
</LinearLayout>

Other files, AndroidManifest.xml and nfc_tech_filter.xml, refer to last example "Android NFC read MifareClassic RFID tag, with android.nfc.action.TECH_DISCOVERED"

download filesDownload the files (Android Studio Format) .

download filesDownload APK .


- Similarly example run on Arduino: Arduino Uno + RFID-RC522, MFRC522 library example DumpInfo
- Step-by-step to make MFRC522-python work on Raspberry Pi 2/raspbian Jessie, read RFID tags using RFID Reader, RFID-RC522.
- Raspberry Pi 2 + MFRC522-python - Dump RFID Tag data using mxgxw/MFRC522-python

Read More..

Tuesday, May 10, 2016

Perbandingan Android KitKat dan Android M

Android M yang hingga saat ini belum diketahui nama aslinya memang menjadi perbincangan hangat apalagi di kalangan developer dimana Google menyediakan Android M developer preview. Pada versi tersebut tidak hanyadeveloper saja, tetapi banyak yang bisa mencoba Android M pada perangkat Nexus. Android M juga disebut sebagai versi Android lanjutan dan versi yang lebih baik dari sebelumnya yaitu Android 5 Lollipop dan Android 4.4 KitKat. Kalau sebelumnya JalanTikus pernah mengulas mengenai perbedaan Android KitKat dan Lollipop, berikut ini perbandingan Android KitKat dan Android M.

Android KitKat vs Android M

1. Desain

android kitkat vs android m: desainDalam hal desain sebenarnya tidak jauh beda dengan Android Lollipop ketika memperkenalkan Material Design. Pada Android M diperlihatkan Material Design yang disempurnakan agar terihat lebih flat dan modern.

2. Fitur

android kitkat vs android m: fiturAndroid M memperkenalkan beberapa fitur terbaru yang tentunya pada sistem yang mendukung seperti Android Pay, versi terbaru dari Google Wallet dengan menggunakan NFC.
Android M juga membawakan versi terbaru dari Google Now dengan menghadirkan pencarian yang lebih akurat dan relevan. Selain itu penyempurnaan dibagian app permission juga memudahkan pengguna mengatur secara bebas untuk mengijikan fitur apa saja yang bisa digunakan aplikasi tersebut.

3. Hardware

Android M mendukung sensor fingerprint, prosesor 64-bit, dan juga USB tipe C.

4. Baterai

Pada Android M, Google menyempurnakan Dalvik serta optimalisasi dari versi Lollipop dimana pada Android M diperkenalkan fitur Doze. Doze merupakan sistem penghematan baterai ketika Android dalam keadaan idle atau tidak sedang digunakan. Hal ini tentu saja dapat menghemat baterai dengan maksimal.
Kesimpulannya adalah Android M lebih baik dibanding Android KitKat mulai dari daya tahan baterai, keamanan, serta dukungan fitur-fitur terbaru yang mungkin tidak akan kamu temui di Android KitKat.
Read More..

The Chord Android SDK Starter Program Part 1


 With all of the knowledge shared with you in the last 3 articles, I wanted to develop a very basic Android app – almost like a “Hello World” App using the Chord Android SDK.

However, by the time I developed the 1stapp, it still seemed like a lot of code. Of course this kind of an app is meant to do a lot more than just say ‘Hello World’. It’s power is best utilized in developing games, I would say.

Like the poker game that is available in the Samsung Android developer documentation.   

So, What are the steps to start with?

Step 1:  You first need to create a channel.  I do this when I initialize my service.  I have written a service that gets an instance of the ChordManager.

public voidinitialize(IChordServiceListener csListener) {
         
          if (mChord != null) {
               return;
          }
         
          mChord = ChordManager.getInstance(this);
          mListener = csListener;
         
          mChord.setTempDirectory(chordFilePath);
          mChord.setHandleEventLooper(getMainLooper());
         
         
     }

Note that I have got an ChordManager here and associated a temporary file path and a the app’s main looper.

Step 2: Next, You would want a way to join the channel So, let us implement the joinChannel() method and leaveChannel() method as its complement.

This is after the ChordManager is up and running.

public IChordChannel joinChannel(String channelName) {
      
        if (channelName == null || channelName.equals("")) {
          
            mPrivateChannelName = MYCHANNEL;
        } else {
            mPrivateChannelName = channelName;
        }

       
        IChordChannel channelInst = mChord.joinChannel(mPrivateChannelName, mChannelListener);

        if (null == channelInst) {
           
            return null;
        }

        return channelInst;
    }

This seems straight forward. MYCHANNEL is a constant declared earlier as public static String MYCHANNEL = "com.sai.CHANNELONE";

If the caller does not pass a channel name, the default one declared would be used.

While joining a channel, we need to pass the Channel name and also an associated listener that is of the type IChordChannelListener.

So next step would be implement this listener.

Note the leave channel code would be like this:
public voidleaveChannel() {
      
        mChord.leaveChannel(mPrivateChannelName);
        mPrivateChannelName = "";
    }

Step 3: Implement the IChordChannelListener.

All the 9 methods of this have to be implemented. These are the methods that would be called back when a file is sent or data is received etc. And the actual implementation for this would be in the Activity that is invoking the ChordManager service.

Here, based on the example from Samsung, I have also implemented these methods mainly as a way of calling a listener that is implemented by the activity invoking it.

@Override
          public void onDataReceived(String arg0, String arg1, String arg2,
                     byte[][] arg3) {

Platinum Solitaire 3 for Android Full

Platinum Solitaire 3 Download

Welcome to Platinum Solitaire 3, the ultimate adaptation of the most popular card game ever. Get ready to trot the globe in pursuit of the good life! Play big, earn some cash, and build your casino empire! Eager to play classic Solitaire? Quickplay mode will provide instant fun. But this new version also lets you enjoy 16 other addictive card games. Unlock new locations and challenges as you progress through the game. But remember: no risk means no reward!
Read More..

Monday, May 9, 2016

Intel Running Android on Atom Chips

Hi all
Check this article found on Technorati.

I believe its a step towards the right direction for Android.
Read More..

Put Android to work Attend the first ever Android for Work Live online conference on November 4th


Editors note: Were launching our first Android for Work Live online event to share how Android is transforming the workplace, expanding the business role of mobile devices and helping companies like Guardian Life Insurance Company achieve more with mobility. The event will take place on Wednesday, Nov 4th at 11 am PDT. Register today.

Mobile devices are essential for navigating our personal lives, from buying movie tickets and guiding us to weekend get togethers to helping us take out a home loan. For consumers, it seems that almost anything can be done now using smartphones and tablets. But in business, these devices have only just begun to change the way we work.

When we launched Android for Work earlier this year, we set out to close this gap, by helping companies use Android’s flexibility and choice to make the most of business mobility. Why? Because we see a world where mobility means so much more than mail, calendar and contacts.

This year, more than 10,000 companies are testing or deploying Android for Work, and Frost & Sullivan recently awarded us the 2015 North America Visionary Innovation Award for Mobile Enterprise Productivity. With Android Marshmallow, we’re taking another step in that journey by building out support for deploying Android devices in a host of scenarios – from dedicated employee use to installing customer-facing hardware that makes interactions more dynamic and responsive.


At Android for Work Live, you’ll:

  • Hear from Andrew Toy, product management director for Android for Work, who’ll discuss the broad vision of Android in the workplace and how businesses can mobilize every worker and workflow.
  • Learn how Android’s vast selection of devices – from affordable phones to locked-down hardware and customized devices – creates choice and agility for BYOD, corporate deployments and single-purpose scenarios.
  • Get an in-depth look at how companies can rely on Android’s built-in multi-layered protections to keep business data secure and managed across all devices in an overview from Adrian Ludwig, technical lead for Android security.
  • Hear insights from Android customers, including Guardian Life Insurance Company.

Register for Android for Work Live today and join the conversation on social media using #AndroidforWorkLive15.
Read More..

Deep Loot Unlimited Money Android game Moded


Salam Blogger :)
Jika waktu adalah uang, Maka Apakah uang dapat membeli waktu ? :)

Details Game: 
Name       : Deep Loot
Genre       : Adventure
Platform  : Android 
Requires  : Android 4.0  and up

Modification on Game: 

1. Unlimited Money


Review Modif:

Screenshoot:


Tutorial Instal : 
1. Download game. 
2. Pindahkan Game ke Androidmu.
3. Uniinstal Version originalnya, jika ada.
4. Instal MOD apk & Play
5. Enjoyyy 

|DOWNLOAD|
Deep Loot - Unlimited Money[Android game: Moded]

|Download Original game|
On Playstore

#Salam Blogger
#Semoga bermanfaat :)
#Ask? comment :)
Read More..

Sunday, May 8, 2016

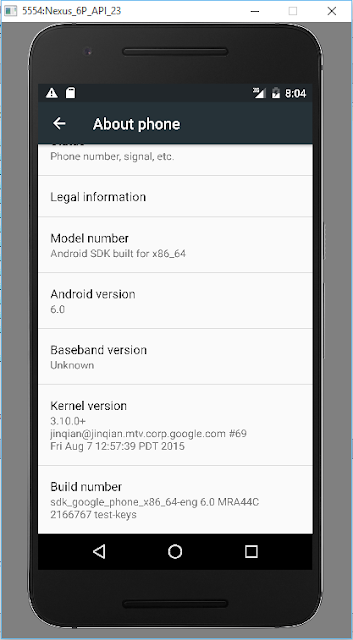
Android Studio AVD Manager now support Nexus 6P 5X profile

Android Studio AVD Manager now support Nexus 6P/5X profile, you can create AVD (Android Virtual Device) running Android 6, Marshmallow, API 23.


Create AVD of Nexus 6P running Android 6 Marshmallow

Read More..

Friday, May 6, 2016

Android Menus part 4 Alternative menus

Android offers a third type of menus: Alternative menus which allow multiple applications to use each other. An application menu can contain menu items that point to other applications that deal with a certain data type that is passed from the application by an intent.

This functionality is related to the concept of Content Providers which is in brief the ability of an application to expose its data (stored in a database or a file) by defining a MIME type to it and through a content URI to be accessed by any other application through this URI.

For example if an application name Employees has some data of employees stored within this application context, and another application wants to access this data; then Employees application should declare a content provider  to expose its data, with a MIME type:

vnd.android.cursor.item/mina.android.Employees so any other application can access the employees data by calling the Uri content://employees/All to access all employees or the Uri content://employees/1 to access a single employee instance (for example).

Back to our Alternative menus issue, suppose this Scenario: We have two applications:
  1. Application A: deals with the employees data.
  2. Application B: receives the content Uri of the employees and do some calculations on it.
Now we want to add an alternative menu item in an activity in Application A so that when clicked passes a URI of employees and launches an activity in Application B (that manipulates the employees data according to the URI received).

So to add the alternative menu item in the activity of Application A, we write the following in onCreateOptionsMenu method:
public boolean onCreateOptionsMenu(Menu menu) {

//adds a regular menu item
menu.add("Regular item");
//create the intent with the Uri of the employees content provider
Intent targetIntent=
new Intent(Intent.ACTION_VIEW, Uri.parse("content://employees/All"));
targetIntent.addCategory(Intent.CATEGORY_ALTERNATIVE);
menu.addIntentOptions(Menu.CATEGORY_ALTERNATIVE, //item group
Menu.CATEGORY_ALTERNATIVE, //item id
Menu.CATEGORY_ALTERNATIVE, //item order
this.getComponentName(), //our activity class name
null, //no specific menu items required
targetIntent, // the intent to handle
0, //no flags
null); //Optional array in which to place the menu
//items that were generated for each of
//the specifics that were requested

return true;
}
Heres what we did:
  • Create an intent with the desired action (Intent.ACTION_VIEW) on the specified content provider Uri (content://employees/All).
  • Call addIntentOptions method with the specified parameters.
The above code adds a menu item that launches all possible activities in all applications on the device that can deal with the action Intent.ACTION_VIEW on the Uri content://employees/All.

Now in Application B, if we want it to handle such an intent we have to do the following.

Define an activity in the application and specify in the AndroidManifest.xml file that this activity can handle the requests of the employees content provider like this:
<activity android_name=".ContentProvidersDemo" android_label="@string/app_name">

<intent-filter android_label="Access Employees">
<action android_name="android.intent.action.VIEW" />
<category android_name="android.intent.category.DEFAULT" />
<category android_name="android.intent.category.ALTERNATIVE" />
<data android_mimeType="vnd.android.cursor.item/mina.android.Employees" />
</intent-filter>
</activity>
The above IntentFilter means that this activity will respond t0 any implicit intent from any application with the following parameters:
  1. Action: Intent.ACTION_VIEW.
  2. Category: android.intent.category.ALTERNATIVE.
  3. Data of MIME type:vnd.android.cursor.item/mina.android.Employees.
So in Application A when you press on the menu button, youll see a menu like this:


When you press on the Access Employees menu item, the activity in Application B will be launched.


Read More..

Install Android Studio on Ubuntu 15 10 using ubuntu developer tools center


remark:
ubuntu-developer-tools-center is now named Ubuntu Make officially.
Please check the updated "Install Android Studio on 64-bit Ubuntu-GNOME 15.10 with Ubuntu Make".


To install Android Studio on Ubuntu 15.10 using ubuntu-developer-tools-center
- install java (refer "Install Oracle java8 on Ubuntu 15.10 via PPA")
- Enter the command in Terminal:
$ sudo apt-get install ubuntu-developer-tools-center
$ udtc android

This video show installing Android Studio on 64-bit Ubuntu 15.10 (run in VirtualBox) using ubuntu-developer-tools-center.

Read More..

DeepFreeze Various Version for Windows XP Download

DeepFreeze Various Version Free Download For Windows XP


Amankan komputer anda dari tangan-tangan jahil dan perusak dengan DeepFreeze!


Read More..

BBM MOD Path Theme For Android Update Version

Aplikasi BBM MOD Tema Path Style For Android Update Version - Untuk anda yang ingin mendapatkan Update Terbaru dari Aplikasi BBM android modifikasi atau BBM Mod dengan Tampilan menyerupai PATH, bisa didapatkan disini.Admin akan memberikan Update dan perkembangan tentang Versi Terbaru untuk itu follow terus blog lingkaran anda. 

Aplikasi BBM seperti anda keatahui begitu fenomenal dan sangat banyak digunakan oleh masyarakat umum, dan dari semua kalangan. Tetapi jika anda bertanya tentang BBM Mod .sedikit yang tahu tentang keberadaannya, Nah makany anda beruntung sekali bisa menggunakan Aplikasi BBM MOD ini karena disediakan untuk anda yang menggunakan Hp Berbasis Android saja. 

Cara mendapatkan dan proses Install di Hp pun tidak sulit dan sangat mudah.. Cukup dengan Download aplikasi yang akan dsediakan dibawah nanti, kemudian anda log ini dengan menggunakan alamat email anda seperti biasa dan Selesai.

Fitur BBM Path Versi 2.9.0.51 :

– New Bubble Chat
– Extended Setting, Guide and About BBM
– Swipe FB Ui to Twiter Ui
– Private Mode with Password
– Backup free sticker
( Baca Disini bila ingin backup stiker dan ingin tau fungsi fitur ini )
– Set Corner Rounded DP
– Cover UI
– Hide/show auto text
– Hide/Show Sponsor
– Enable/disable Full DP
– Reload BBM
– Custom Font
– Move to SD card
– Auto Rotation
– Enable/Disable Enter Key
SCREENSHOT
Mod By erwin tomy
BBM MOD Path Theme For Android Update Version

Link Download
BBM Tema Path Versi 2.9.0.51 Apk- DOWNLOAD
Demikian dan Terimakasih atas kunjungan anda, jika ada yang belum paham bagaimana cara Install di Hp Android silahkan berkomentar dibawah.
Read More..

Tuesday, May 3, 2016

PocketGod Full for Android Direct Download

Pocket God 1.4.1 Logo
You’re the island god!
What kind of god would you be? Benevolent or vengeful? Play Pocket God™ and discover the answer within yourself. Pocket God is an episodic microgame for you to explore, show your friends and have fun with. It contains multiple locations with many hilarious scenarios, exciting mini-games and hidden secrets for you to uncover.
Read More..

How to rotate the Android Emulator

To rotate the Android Emulator, just disable the Num Lock key and and use the 7 and the 9 in the num pad to rotate the emulator and change its layout from portrait to landscape.

If you are working on a laptop you can do the same thing by pressing  Fn(Function)+7 or Fn+9.
Read More..

Monday, May 2, 2016

Android Chronometer Timer

In this post we are going to explore the Android Chronometer control.

The chronometer acts as a timer. In this post we are going to create a simple timer using the Chronometer

Let’s start with the interface:
<?xml version="1.0" encoding="utf-8"?>
<LinearLayout
android_orientation="vertical"
android_layout_width="fill_parent"
android_layout_height="fill_parent"
>
<TextView
android_layout_width="fill_parent"
android_layout_height="wrap_content"
android_id="@+id/txt"
/>

<Chronometer
android_layout_width="wrap_content"
android_layout_height="wrap_content"
android_id="@+id/chrono"
/>

<Button
android_layout_width="wrap_content"
android_layout_height="wrap_content"
android_id="@+id/btnStart"
android_text="Start"
android_onClick="onClick"
/>

<Button
android_layout_width="wrap_content"
android_layout_height="wrap_content"
android_id="@+id/btnStop"
android_text="Stop"
android_onClick="onClick"
/>

<Button
android_layout_width="wrap_content"
android_layout_height="wrap_content"
android_id="@+id/btnReset"
android_text="Reset"
android_onClick="onClick"
/>
</LinearLayout>


Define instances of the controls
Chronometer chrono;
Button btnStart;
Button btnStop;
TextView txt;
And some variables
long elapsedTime=0;
String currentTime="";
long startTime=SystemClock.elapsedRealtime();
Boolean resume=false;
we put the Boolean flag differentiate between starting the Chronometer for the first time or resuming it after pause.

Getting inside the onCreate method:
super.onCreate(savedInstanceState);
setContentView(R.layout.main);
chrono=(Chronometer)findViewById(R.id.chrono);
btnStart=(Button)findViewById(R.id.btnStart);
btnStop=(Button)findViewById(R.id.btnStop);
btnReset=(Button)findViewById(R.id.btnReset);
txt=(TextView)findViewById(R.id.txt);

Now to handle each button click event
public void onClick(View v) {
// TODO Auto-generated method stub
switch(v.getId())
{
case R.id.btnStart:
btnStart.setEnabled(false);
btnStop.setEnabled(true);
if(!resume)
{
chrono.setBase(SystemClock.elapsedRealtime());
chrono.start();
}
else
{

chrono.start();
}

break;
case R.id.btnStop:
btnStart.setEnabled(true);
btnStop.setEnabled(false);
chrono.stop();
chrono.setText(currentTime);
resume=true;
btnStart.setText("Resume");
break;
case R.id.btnReset:

chrono.stop();
chrono.setText("00:00");
resume=false;
btnStop.setEnabled(false);
break;
}
}


The start button:
The start button can be clicked in two scenarios:
  1. Starting the Chronometer for the first time:
    1. We set base of the Chronometer, which is the time in Milliseconds from where the Chronometer starts counting from.
      We set it to SystemClock.elapsedRealtime() Which is the time in Milliseconds since the device boot (equivalent to current time).
    2. then start the Chronometer
  2. Resuming the chronometer count after start:
    here we start the chronometer again to resume counting from the value it had when it was stopped.

The stop button:
The stop button pauses the chronometer. And sets the resume flag to true to indicate that the next click on the start button will resume counting [not starting counting from zero].

The Reset button:
The stop button resets the chronometer so the next click on start button will start counting from zero

The chronometer can implement OnChronometerTickListener interface which requires an implementation of the onChronometerTick method.


The onChronometerTick method handles the Chronometer tick event which occurs every second.

Here’s the implementation of the onChronometerTick method:
chrono.setOnChronometerTickListener(new OnChronometerTickListener()
{

public void onChronometerTick(Chronometer arg0) {
// TODO Auto-generated method stub

if(!resume)
{

long minutes=((SystemClock.elapsedRealtime()-chrono.getBase())/1000)/60;
long seconds=((SystemClock.elapsedRealtime()-chrono.getBase())/1000)%60;
currentTime=minutes+":"+seconds;
arg0.setText(currentTime);
elapsedTime=SystemClock.elapsedRealtime();
}
else
{

long minutes=((elapsedTime-chrono.getBase())/1000)/60;
long seconds=((elapsedTime-chrono.getBase())/1000)%60;
currentTime=minutes+":"+seconds;
arg0.setText(currentTime);
elapsedTime=elapsedTime+1000;
}


}

}
);

In this method we handle two scenarios:
  1. The chronometer starts for the first time (or from zero):
    The method is invoked every second Here we calculate the difference between the current time(SystemClock.elapsedRealtime) and the time from which the chronometer started counting(chrono.getBase()) and display it.
    Then we store the current time so that when we pause the chronometer we hold the last value of chronometer
    elapsedTime=SystemClock.elapsedRealtime();
  2. The chronometer is resumed after stop:
    Here we calculate the difference between the last value of the chronometer (elaspedTime) and the value from which the chronometer started counting (chrono.getBase())
    Then we increment the value of the elapsedTime by 1000 milliseconds (1 second) so that it is update with each tick.


And that was a simple stopwatch or timer using Android Chronometer Control. Sure you noticed that it is limited to minutes and seconds only. This is because the onTimerTick method is invoked every second so we cannot update the elapsed milliseconds.

You can download the application from here
Read More..