Pages

Showing posts with label studio. Show all posts

Sunday, May 8, 2016

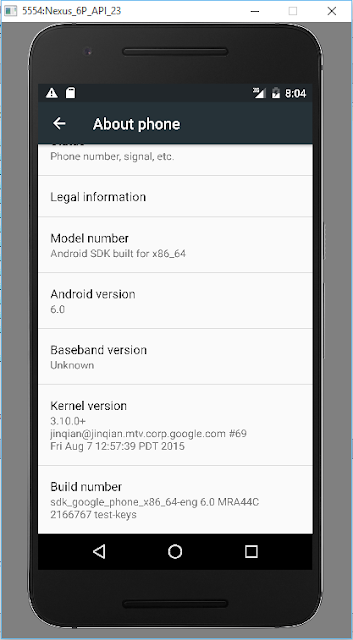
Android Studio AVD Manager now support Nexus 6P 5X profile

Android Studio AVD Manager now support Nexus 6P/5X profile, you can create AVD (Android Virtual Device) running Android 6, Marshmallow, API 23.


Create AVD of Nexus 6P running Android 6 Marshmallow

Read More..

Friday, May 6, 2016

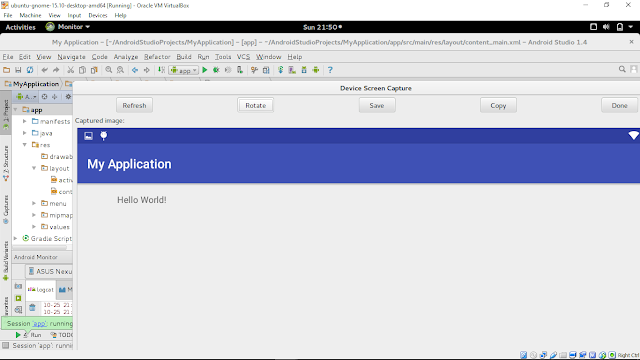
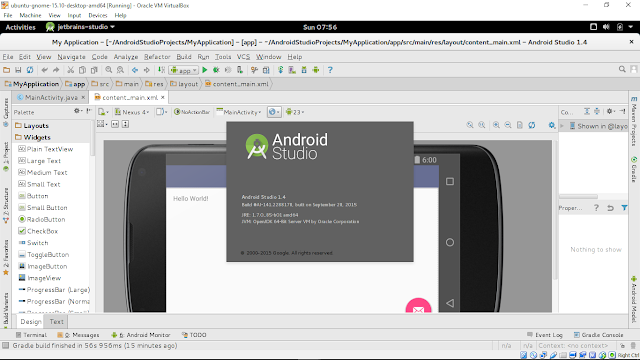
Install Android Studio on Ubuntu 15 10 using ubuntu developer tools center


remark:
ubuntu-developer-tools-center is now named Ubuntu Make officially.
Please check the updated "Install Android Studio on 64-bit Ubuntu-GNOME 15.10 with Ubuntu Make".


To install Android Studio on Ubuntu 15.10 using ubuntu-developer-tools-center
- install java (refer "Install Oracle java8 on Ubuntu 15.10 via PPA")
- Enter the command in Terminal:
$ sudo apt-get install ubuntu-developer-tools-center
$ udtc android

This video show installing Android Studio on 64-bit Ubuntu 15.10 (run in VirtualBox) using ubuntu-developer-tools-center.

Read More..

Thursday, May 5, 2016

Android Chat example with server sending individual message to specify client


Refer to my old post of Simple Android Chat Application, server side, and client side. Function to send sending individual message to specify client is added in server side.


uses-permission of "android.permission.INTERNET" is needed in AndroidManifest.xml, for both server and client.


Server side:

MainActivity.java
package com.blogspot.android_er.androidchatserver;

import android.os.Bundle;
import android.support.v7.app.AppCompatActivity;
import android.view.View;
import android.widget.ArrayAdapter;
import android.widget.Button;
import android.widget.Spinner;
import android.widget.TextView;
import android.widget.Toast;

import java.io.DataInputStream;
import java.io.DataOutputStream;
import java.io.IOException;
import java.net.InetAddress;
import java.net.NetworkInterface;
import java.net.ServerSocket;
import java.net.Socket;
import java.net.SocketException;
import java.util.ArrayList;
import java.util.Enumeration;
import java.util.List;

public class MainActivity extends AppCompatActivity {

static final int SocketServerPORT = 8080;

TextView infoIp, infoPort, chatMsg;
Spinner spUsers;
ArrayAdapter<ChatClient> spUsersAdapter;
Button btnSentTo;

String msgLog = "";

List<ChatClient> userList;

ServerSocket serverSocket;

@Override
protected void onCreate(Bundle savedInstanceState) {
super.onCreate(savedInstanceState);
setContentView(R.layout.activity_main);
infoIp = (TextView) findViewById(R.id.infoip);
infoPort = (TextView) findViewById(R.id.infoport);
chatMsg = (TextView) findViewById(R.id.chatmsg);

spUsers = (Spinner) findViewById(R.id.spusers);
userList = new ArrayList<ChatClient>();
spUsersAdapter = new ArrayAdapter<ChatClient>(
MainActivity.this, android.R.layout.simple_spinner_item, userList);
spUsersAdapter.setDropDownViewResource(android.R.layout.simple_spinner_dropdown_item);
spUsers.setAdapter(spUsersAdapter);

btnSentTo = (Button)findViewById(R.id.sentto);
btnSentTo.setOnClickListener(btnSentToOnClickListener);

infoIp.setText(getIpAddress());

ChatServerThread chatServerThread = new ChatServerThread();
chatServerThread.start();
}

View.OnClickListener btnSentToOnClickListener = new View.OnClickListener() {
@Override
public void onClick(View v) {
ChatClient client = (ChatClient)spUsers.getSelectedItem();
if(client != null){
String dummyMsg = "Dummy message from server. ";
client.chatThread.sendMsg(dummyMsg);
msgLog += "- Dummy message to " + client.name + " ";
chatMsg.setText(msgLog);

}else{
Toast.makeText(MainActivity.this, "No user connected", Toast.LENGTH_LONG).show();
}
}
};

@Override
protected void onDestroy() {
super.onDestroy();

if (serverSocket != null) {
try {
serverSocket.close();
} catch (IOException e) {
// TODO Auto-generated catch block
e.printStackTrace();
}
}
}

private class ChatServerThread extends Thread {

@Override
public void run() {
Socket socket = null;

try {
serverSocket = new ServerSocket(SocketServerPORT);
MainActivity.this.runOnUiThread(new Runnable() {

@Override
public void run() {
infoPort.setText("Im waiting here: "
+ serverSocket.getLocalPort());
}
});

while (true) {
socket = serverSocket.accept();
ChatClient client = new ChatClient();
userList.add(client);
ConnectThread connectThread = new ConnectThread(client, socket);
connectThread.start();

runOnUiThread(new Runnable() {
@Override
public void run() {
spUsersAdapter.notifyDataSetChanged();
}
});
}

} catch (IOException e) {
e.printStackTrace();
} finally {
if (socket != null) {
try {
socket.close();
} catch (IOException e) {
// TODO Auto-generated catch block
e.printStackTrace();
}
}
}

}

}

private class ConnectThread extends Thread {

Socket socket;
ChatClient connectClient;
String msgToSend = "";

ConnectThread(ChatClient client, Socket socket){
connectClient = client;
this.socket= socket;
client.socket = socket;
client.chatThread = this;
}

@Override
public void run() {
DataInputStream dataInputStream = null;
DataOutputStream dataOutputStream = null;

try {
dataInputStream = new DataInputStream(socket.getInputStream());
dataOutputStream = new DataOutputStream(socket.getOutputStream());

String n = dataInputStream.readUTF();

connectClient.name = n;

msgLog += connectClient.name + " connected@" +
connectClient.socket.getInetAddress() +
":" + connectClient.socket.getPort() + " ";
MainActivity.this.runOnUiThread(new Runnable() {

@Override
public void run() {
chatMsg.setText(msgLog);
}
});

dataOutputStream.writeUTF("Welcome " + n + " ");
dataOutputStream.flush();

broadcastMsg(n + " join our chat. ");

while (true) {
if (dataInputStream.available() > 0) {
String newMsg = dataInputStream.readUTF();


msgLog += n + ": " + newMsg;
MainActivity.this.runOnUiThread(new Runnable() {

@Override
public void run() {
chatMsg.setText(msgLog);
}
});

broadcastMsg(n + ": " + newMsg);
}

if(!msgToSend.equals("")){
dataOutputStream.writeUTF(msgToSend);
dataOutputStream.flush();
msgToSend = "";
}

}

} catch (IOException e) {
e.printStackTrace();
} finally {
if (dataInputStream != null) {
try {
dataInputStream.close();
} catch (IOException e) {
// TODO Auto-generated catch block
e.printStackTrace();
}
}

if (dataOutputStream != null) {
try {
dataOutputStream.close();
} catch (IOException e) {
// TODO Auto-generated catch block
e.printStackTrace();
}
}

userList.remove(connectClient);

MainActivity.this.runOnUiThread(new Runnable() {

@Override
public void run() {
spUsersAdapter.notifyDataSetChanged();
Toast.makeText(MainActivity.this,
connectClient.name + " removed.", Toast.LENGTH_LONG).show();

msgLog += "-- " + connectClient.name + " leaved ";
MainActivity.this.runOnUiThread(new Runnable() {

@Override
public void run() {
chatMsg.setText(msgLog);
}
});

broadcastMsg("-- " + connectClient.name + " leaved ");
}
});
}

}

private void sendMsg(String msg){
msgToSend = msg;
}

}

private void broadcastMsg(String msg){
for(int i=0; i<userList.size(); i++){
userList.get(i).chatThread.sendMsg(msg);
msgLog += "- send to " + userList.get(i).name + " ";
}

MainActivity.this.runOnUiThread(new Runnable() {

@Override
public void run() {
chatMsg.setText(msgLog);
}
});
}

private String getIpAddress() {
String ip = "";
try {
Enumeration<NetworkInterface> enumNetworkInterfaces = NetworkInterface
.getNetworkInterfaces();
while (enumNetworkInterfaces.hasMoreElements()) {
NetworkInterface networkInterface = enumNetworkInterfaces
.nextElement();
Enumeration<InetAddress> enumInetAddress = networkInterface
.getInetAddresses();
while (enumInetAddress.hasMoreElements()) {
InetAddress inetAddress = enumInetAddress.nextElement();

if (inetAddress.isSiteLocalAddress()) {
ip += "SiteLocalAddress: "
+ inetAddress.getHostAddress() + " ";
}

}

}

} catch (SocketException e) {
// TODO Auto-generated catch block
e.printStackTrace();
ip += "Something Wrong! " + e.toString() + " ";
}

return ip;
}

class ChatClient {
String name;
Socket socket;
ConnectThread chatThread;

@Override
public String toString() {
return name + ": " + socket.getInetAddress().getHostAddress();
}
}
}


activity_main.xml
<?xml version="1.0" encoding="utf-8"?>
<LinearLayout

android_layout_width="match_parent"
android_layout_height="match_parent"
android_padding="16dp"
android_orientation="vertical"
tools_context="com.blogspot.android_er.androidchatserver.MainActivity">

<TextView
android_layout_width="wrap_content"
android_layout_height="wrap_content"
android_layout_gravity="center_horizontal"
android_autoLink="web"
android_text="http://android-er.blogspot.com/"
android_textStyle="bold" />

<TextView
android_layout_width="match_parent"
android_layout_height="wrap_content"
android_text="Char Server"
android_textStyle="bold" />

<TextView
android_id="@+id/infoport"
android_layout_width="wrap_content"
android_layout_height="wrap_content"
android_textStyle="italic" />

<TextView
android_id="@+id/infoip"
android_layout_width="wrap_content"
android_layout_height="wrap_content"
android_textStyle="italic" />

<Spinner
android_id="@+id/spusers"
android_layout_width="match_parent"
android_layout_height="wrap_content"/>

<Button
android_id="@+id/sentto"
android_layout_width="match_parent"
android_layout_height="wrap_content"
android_text="Sent msg to individual user"/>

<ScrollView
android_layout_width="match_parent"
android_layout_height="match_parent" >

<TextView
android_id="@+id/chatmsg"
android_layout_width="wrap_content"
android_layout_height="wrap_content" />
</ScrollView>
</LinearLayout>


download filesDownload the server side files (Android Studio Format) .

Client side same as in the post "Simple Android Chat Application, client side" in Android Studio form.

download filesDownload the client side files (Android Studio Format) .

Read More..

Tuesday, May 3, 2016

Android Studio Cookbook

Design, test, and debug your apps using Android Studio

Android Studio Cookbook

About This Book
  • See what Material design is about and how to apply it your apps
  • Explore the possibilities to develop apps that works on any type of device
  • A step-by-step practical guide that will help you build improved applications, change their look, and debug them
Who This Book Is For
This book is for developers that are already familiar with programming concepts and have already started creating apps for the Android platform, for example, by using the Eclipse IDE. It is for developers who intend to use Android Studio as their primary IDE or want to use Android Studio more efficiently.

What You Will Learn
  • Develop Android Studio applications using Genymotion
  • Apply the concepts of Material design to your applications
  • Use memory monitoring tools to tweak performance
  • Build applications for Android Wearable
  • Capture images, video, or audio within your Android app
  • Use content providers to display data
  • Build apps with a cloud-based backend
  • Create media-related apps that will run on phones, phablets, tablets, and TVs
In Detail
This book starts with an introduction of Android Studio and why you should use this IDE rather than Eclipse. Moving ahead, it teaches you to build a simple app that requires no backend setup but uses Google Cloud or Parse instead. After that, you will learn how to create an Android app that can send and receive text and images using Google Cloud or Parse as a backend. It explains the concepts of Material design and how to apply them to an Android app. Also, it shows you how to build an app that runs on an Android wear device.

Later, it explains how to build an app that takes advantage of the latest Android SDK while still supporting older Android versions. It also demonstrates how the performance of an app can be improved and how memory management tools that come with the Android Studio IDE can help you achieve this.

By the end of the book, you will be able to develop high quality apps with a minimum amount of effort using the Android Studio IDE.

Style and approach
This is a practical guide full of challenges and many real-world examples that demonstrate interesting development concepts. Besides smartphones and tablets, it also covers Android wearable devices and Android TV. Although strongly recommended, it is not necessary to own any Android device yourself.

Read More..

Saturday, April 30, 2016

Setup Hardware Devices debugging for Android Studio on Ubuntu 15 10

This video show how to setup /etc/udev/rules.d/51-android.rules in Ubuntu (behind VirtualBox) to enable hardware device debugging in Android Studio.


The development platform is 64-bit Ubuntu-GNOME 15.10 running in VirtualBox, with Android Studio installed with Ubuntu Make (umake).

To enable hardware device debugging in Ubuntu, you have to create /etc/udev/rules.d/51-android.rules file to add device IDs for your debugging devices. (refer: Android Developers Document Using Hardware Devices - Setting up a Device for Development)

Create /etc/udev/rules.d/51-android.rules file with sudo right, add the line and save:
SUBSYSTEM=="usb", ATTR{idVendor}=="18d1", MODE="0666", GROUP="plugdev"
where "18d1" is the USB Vendor ID for Google, Nexus 7 in my case.

Run the command:
$ sudo chmod a+r /etc/udev/rules.d/51-android.rules

This video show how to, behind VirtualBox.

Read More..

Sunday, April 24, 2016

Whats New in Android Studio Android Dev Summit 2015


Related:
- Steps to create AVD using new Android Emulator in Android Studio 2.0 Preview

Read More..

Saturday, April 23, 2016

Do you want to write on Android Revolution HD blog

Its time to expand. This place has a potential and I want it to become even more popular. If you are interested in making this place even better and more crowded, please keep reading!

So, what I am looking for?

Strong written English
This is essential. Its fine if English isnt your first language, its not if I have to rewrite all your posts. Your grammar and variety of vocabulary must be at an advanced level.

Good understanding of mobile tech and an attention to detail
Know the areas you want to write about, know the sources and strive for accuracy. Your articles must have some particular level of quality, otherwise it cant be published.

Have an opinion
Re-posting news from other tech-sites is not welcomed. You need to be able to understand what things mean, put it in context and share your thoughts with our readers. Im more interested in creating the opinion rather then passing some news along.

Regular contribution
This isnt a job offer, but this might change in the future. For now I want to create a friendly place where dedicated people can share their thoughts (and there is a lot to share nowadays). I ask that all applicants are able to post on average 1-2 times a week. News posts dont have to be thousands of words, in most cases a couple of hundred will suffice.

Technologies
Im mostly interested in Android / Windows Phone articles, however the variety of potential topics is: "Linux Kernels" | "Linux General" | "Android General" | "Android Devices" | "Windows Devices" | "Other OS Devices" | "Tablets" | "Gadgets" | "Manufacturers News" | "PC News" | "your idea".


There is no age limitation. Everyone can have hobby and be addicted to gadgets :)

How to apply
Please contact us via our Twitter profile: Twitter
Read More..

Wednesday, April 20, 2016

Android 6 Essentials

Design, build, and create your own applications using the full range of features available in Android 6

Android 6 Essentials

About This Book
  • Learn how to utilize the robust features of Android 6 to design, develop, and publish better Android applications
  • Get useful guidance on creating new apps or migrating existing apps to support features such as app permissions, app links, fingerprint authentication, etc
  • A fast paced guide, packed with hands-on examples that ties all the features such as API, audio, video, camera, tab customization together under a single cover
Who This Book Is For
This book is for Android developers who are looking to move their applications into the next Android version with ease.

What You Will Learn
  • Familiarize yourself with the features of Android 6
  • Code with the new Android permissions model
  • Use apps auto backup and restore lost data automatically
  • Increase user engagement with apps through an assistant using triggers and providing contextual assistance
  • Assess and handle proper usage of the API
  • Work with Audio, Video,Camera in Android 6
  • Utilize the new features in Android for professional purposes
  • Understand and code Chromes custom tabs
In Detail
Android 6 is the latest and greatest version of the Android operating system, and comes packed with cutting edge new features for you to harness for the benefit of building better applications.

This step-by-step guide will take you through the basics of the Android Marshmallow permissions model and beyond into other crucial areas such as the Audio,Video,Camera API and Androids at work features. Learn how to create, deploy, and manage Android applications with Marshmallows API and the latest functionalities.

The combination of instructions and real-world examples will make your application deployment and testing a breeze.

Style and approach
This easy-to-follow, step-by-step tutorial provides explanations and examples to add the new Android 6 features to your skill set. Each chapter provides sequential steps and detailed information about the API, as well as best practices and testing options.

Read More..

Sunday, April 17, 2016

Create AVD using new Android Emulator in Android Studio 2 0 Preview


New Android Emulator Preview is available now, you can create AVD using new Emulator in Android Studio 2.0 Preview.

When I try it, dialog pop up with error message:
emulator: ERROR: Couldnt find crash service executable
C:UsersuserAppDataLocalAndroidsdk oolsemulator64-crash-service.exe
...
I check my system, I have emulator-crash-service.exe, not emulator64-crash-service.exe! I dont know is it a bug, or anything wrong in my setting.

updated@2015-12-13:
Seem its a bug of the new emulator in Windows. Somebody reported this issue: https://code.google.com/p/android/issues/detail?id=196629


Anyway, the emulator still can run and deploy my Hello World. This video show steps to create AVD using new Android Emulator in Android Studio 2.0 Preview; run on Windows 10 with CPU of Intel i5.


Reference:
- Android Developers Blog: Android Studio 2.0 Preview: Android Emulator
- Android Tools Project Site: Android Emulator Preview (with system requirement and update SDK)


Read More..

Wednesday, April 6, 2016

Android Studio Game Development Concepts and Design

Android Studio Game Development: Concepts and Design

This one of a kind short book walks any Android developer through the process of creating mobile games using the new Android Studio IDE. Android Studio offers a myriad of tools for developers such as enhanced intellisense and device emulation. This book provides a quick and easy to read format; introduces the reader to these key tools and gives them the knowledge they need to develop games in Android Studio.

What You’ll Learn
  • How to create projects in Android Studio
  • How to use the SDK manager to keep your Android SDK current
  • How to commit and get projects to and from Git hub
  • How to use OpenGL ES to load images
  • How to react to player input
  • How to debug your games using Android Studio
Audience

This book is for those who may be new to game development who have some experience with Android Studio IDE and Android.  To learn about Android Studio, check out Learn Android Studio IDE by Gerber and Craig (Apress).

Read More..

Saturday, April 2, 2016

Xamarin Studio for Android Programming A C Cookbook

Over 50 hands-on recipes to help you get grips with Xamarin Studio and C# programming to develop market-ready Android applications

Xamarin Studio for Android Programming: A C# Cookbook

About This Book
  • Create Android applications with C# and Xamarin
  • Reuse your Android application to develop iOS and Windows Phone applications
  • Leverage the easy-to-succeed recipes to exploit the latest Android releases and develop new applications
Who This Book Is For
If you have already developed an Android applications with Java and you now intend to use C# and Xamarin Studios capabilities, or if you have never taken the dive into mobiles, then this book is for you. It would be helpful to have some C# experience so you follow the recipes in this book, though knowledge of Android is not required.

What You Will Learn
  • Build a GUI for your Android applications
  • Explore Android activities and understand configuration changes
  • Manage multiscreens, icons, and multimedia in your applications
  • Start and bind Android services and create notifications
  • Create beautiful applications using the camera and animations
  • Effectively couple your phones hardware with applications
  • Integrate advertisements and select the right advertisement providers for your applications
In Detail
Multiplatform applications have taken the development world by storm. This has revolutionized the selection of the right tools for the efficient development and deployment of applications. Xamarin studio is emerging as the preferred choice among .NET/C# developers. It enables them to design cross-platform applications using their favorite language and IDE. Xamarin studio is supported by the Mac OS and Windows platforms, and you can develop your own applications for iOS, Windows, or Android with its help.

This book takes you through all the stages of application development, right from getting started with Xamarin and developing a GUI to putting up your application on the store. The recipes will help you in acquiring sufficient knowledge to go about creating applications.

Starting with introducing Xamarin studio, its underlying technologies, and the Android ecosystem, the book goes on to cover the graphical aspects of creating Android applications. Moving on, you will learn more about data management with Android services. This is followed by techniques on how to interact with the Android OS and the phones hardware, before finally concluding with mobile advertisements and Google Play. By the end of this book, you will have discovered all the specialties related to developing Android application with Xamarin Studio.

Style and approach
This book is organized around hands-on and practical recipes that focus on the development of Android applications using C# and Xamarin. Each recipe is easy to follow to help you progress efficiently through the book.

Read More..

Thursday, March 31, 2016

Install Android Studio on 64 bit Ubuntu 15 10 with Ubuntu Make umake

Ubuntu Make is a command line tool which allows you to download the latest version of popular developer tools (include Android Studio) on your installation, installing it longside all the required dependencies (which will only ask for root access if you dont have all the required dependencies installed already), enable multi-arch on your system if you are on a 64 bit machine, integrate it with the Unity launcher… Basically, one command to get your system ready to develop with!


To install Android Studio on Ubuntu:

- Add the Ubuntu Make ppa:
$ sudo add-apt-repository ppa:ubuntu-desktop/ubuntu-make
$ sudo apt-get update

- Install Ubuntu Make:
$ sudo apt-get install ubuntu-make

- Install android-studio:
$ umake android

Once finished, it will also install Java 7 (1.7.0_85 currently) on your system.

This video show how to install Android Studio on 64-bit Ubuntu-GNOME (run on VirtualBox) with Ubuntu Make.


Next:
- Setup Hardware Devices debugging for Android Studio on Ubuntu 15.10

Read More..

Wednesday, March 16, 2016

Install Android Studio 2 0 Preview on Ubuntu Linux parallel with existing installed Android Studio


Android Studio 2.0 Preview is available to download in Canary Channel now. This video show how to download and run in Ubuntu (Ubuntu-GNOME 15.10 on VirtualBox/Windows 10), in parallel with existing installed Android Studio 1.5.


(reference: Android Developers Blog)

Related:
- Download and run Android Studio 2.0 Preview on Windows 10

Read More..

Friday, March 4, 2016

Android Studio Development Essentials Android 6 Edition

Android Studio Development Essentials - Android 6 Edition

Fully updated for Android 6, the goal of this book is to teach the skills necessary to develop Android based applications using the Android Studio Integrated Development Environment (IDE) and the Android 6 Software Development Kit (SDK).

Beginning with the basics, this book provides an outline of the steps necessary to set up an Android development and testing environment. An overview of Android Studio is included covering areas such as tool windows, the code editor and the Designer tool. An introduction to the architecture of Android is followed by an in-depth look at the design of Android applications and user interfaces using the Android Studio environment. More advanced topics such as database management, content providers and intents are also covered, as are touch screen handling, gesture recognition, camera access and the playback and recording of both video and audio. This edition of the book also covers printing, transitions and cloud-based file storage.

The concepts of material design are also covered in detail, including the use of floating action buttons, Snackbars, tabbed interfaces, card views, navigation drawers and collapsing toolbars.

In addition to covering general Android development techniques, the book also includes Google Play specific topics such as implementing maps using the Google Maps Android API, in-app billing and submitting apps to the Google Play Developer Console.

Chapters also cover advanced features of Android Studio such as Gradle build configuration and the implementation of build variants to target multiple Android device types from a single project code base.

Assuming you already have some Java programming experience, are ready to download Android Studio and the Android SDK, have access to a Windows, Mac or Linux system and ideas for some apps to develop, you are ready to get started.

Read More..

Monday, February 29, 2016

Android example code using ColorFilter


MainActivity.java
package com.blogspot.android_er.androidcolorfilter;

import android.graphics.ColorFilter;
import android.graphics.ColorMatrixColorFilter;
import android.os.Bundle;
import android.support.v7.app.AppCompatActivity;
import android.widget.ImageView;
import android.widget.SeekBar;

public class MainActivity extends AppCompatActivity {

ImageView imageView;
SeekBar redBar, greenBar, blueBar;

@Override
protected void onCreate(Bundle savedInstanceState) {
super.onCreate(savedInstanceState);
setContentView(R.layout.activity_main);

imageView = (ImageView)findViewById(R.id.iv);
redBar = (SeekBar)findViewById(R.id.redbar);
greenBar = (SeekBar)findViewById(R.id.greenbar);
blueBar = (SeekBar)findViewById(R.id.bluebar);

redBar.setOnSeekBarChangeListener(colorBarChangeListener);
greenBar.setOnSeekBarChangeListener(colorBarChangeListener);
blueBar.setOnSeekBarChangeListener(colorBarChangeListener);

setColorFilter(imageView);
}

SeekBar.OnSeekBarChangeListener colorBarChangeListener
= new SeekBar.OnSeekBarChangeListener(){

@Override
public void onProgressChanged(SeekBar seekBar, int progress, boolean fromUser) {
setColorFilter(imageView);
}

@Override
public void onStartTrackingTouch(SeekBar seekBar) {

}

@Override
public void onStopTrackingTouch(SeekBar seekBar) {

}
};

private void setColorFilter(ImageView iv){

/*
* 5x4 matrix for transforming the color+alpha components of a Bitmap.
* The matrix is stored in a single array, and its treated as follows:
* [ a, b, c, d, e,
* f, g, h, i, j,
* k, l, m, n, o,
* p, q, r, s, t ]
*
* When applied to a color [r, g, b, a], the resulting color is computed
* as (after clamping)
* R = a*R + b*G + c*B + d*A + e;
* G = f*R + g*G + h*B + i*A + j;
* B = k*R + l*G + m*B + n*A + o;
* A = p*R + q*G + r*B + s*A + t;
*/

float redValue = ((float)redBar.getProgress())/255;
float greenValue = ((float)greenBar.getProgress())/255;
float blueValue = ((float)blueBar.getProgress())/255;

float[] colorMatrix = {
redValue, 0, 0, 0, 0, //red
0, greenValue, 0, 0, 0, //green
0, 0, blueValue, 0, 0, //blue
0, 0, 0, 1, 0 //alpha
};

ColorFilter colorFilter = new ColorMatrixColorFilter(colorMatrix);
iv.setColorFilter(colorFilter);
}

}


layout/activity_main.xml
<?xml version="1.0" encoding="utf-8"?>
<LinearLayout


android_layout_width="match_parent"
android_layout_height="match_parent"
android_padding="16dp"
android_orientation="vertical"
tools_context=".MainActivity">

<TextView
android_layout_width="wrap_content"
android_layout_height="wrap_content"
android_layout_gravity="center_horizontal"
android_autoLink="web"
android_text="http://android-er.blogspot.com/"
android_textStyle="bold" />

<ImageView
android_id="@+id/iv"
android_layout_width="wrap_content"
android_layout_height="wrap_content"
android_src="@mipmap/ic_launcher"/>

<SeekBar
android_id="@+id/redbar"
android_layout_width="match_parent"
android_layout_height="wrap_content"
android_max="255"
android_progress="255"/>
<SeekBar
android_id="@+id/greenbar"
android_layout_width="match_parent"
android_layout_height="wrap_content"
android_max="255"
android_progress="255"/>
<SeekBar
android_id="@+id/bluebar"
android_layout_width="match_parent"
android_layout_height="wrap_content"
android_max="255"
android_progress="255"/>
</LinearLayout>


Related:
- Convert ImageView to black and white, and set brightness, using ColorFilter

Read More..

Friday, February 26, 2016

Find debug keystore and SHA1 in Android Studio


This video show how to find debug.keystore and SHA1 in Android Studio:


Read More..

Thursday, February 25, 2016

Download and run Android Studio 2 0 Preview on Windows 10


This video show how to download and run Android Studio 2.0 Preview from Canary Channel?, in parallel with existing installed Android Studio 1.5.
(The Emulator is seem still the old version, not the New Android Emulator)

reference: Android Developers Blog announcement


Related: Install Android Studio 2.0 Preview on Ubuntu Linux, parallel with existing installed Android Studio


Read More..

Sunday, February 21, 2016

Android NDK Game Development Cookbook

Android NDK Game Development Cookbook

For C++ developers, this is the book that can swiftly propel you into the potentially profitable world of Android games. The 70+ step-by-step recipes using Android NDK will give you the wide-ranging knowledge you need.

Overview
  • Tips and tricks for developing and debugging mobile games on your desktop
  • Enhance your applications by writing multithreaded code for audio playback, network access, and asynchronous resource loading
  • Enhance your game development skills by using modern OpenGL ES and develop applications without using an IDE
  • Features two ready-to-run Android games
In Detail

Android NDK is used for multimedia applications which require direct access to a systems resources. Android NDK is also the key for portability, which in turn provides a reasonably comfortable development and debugging process using familiar tools such as GCC and Clang toolchains. If your wish to build Android games using this amazing framework, then this book is a must-have.

This book provides you with a number of clear step-by-step recipes which will help you to start developing mobile games with Android NDK and boost your productivity debugging them on your computer. This book will also provide you with new ways of working as well as some useful tips and tricks that will demonstrably increase your development speed and efficiency.

This book will take you through a number of easy-to-follow recipes that will help you to take advantage of the Android NDK as well as some popular C++ libraries. It presents Android application development in C++ and shows you how to create a complete gaming application.

You will learn how to write portable multithreaded C++ code, use HTTP networking, play audio files, use OpenGL ES, to render high-quality text, and how to recognize user gestures on multi-touch devices. If you want to leverage your C++ skills in mobile development and add performance to your Android applications, then this is the book for you.

What you will learn from this book
  • Port popular C++ libraries to Android
  • Write portable multithreaded code
  • Play audio with OpenAL
  • Implement gesture recognition
  • Render text with FreeType
  • Use OpenGL ES to port and abstract APIs from the game code to develop games on a desktop PC
  • Debug mobile applications on your desktop
  • Access Flickr and Picasa web services from C++
  • Extract resources from APK archives
  • Develop Android applications without an IDE
Approach

A systematic guide consisting of over 70 recipes which focus on helping you build portable mobile games and aims to enhance your game development skills with clear instructions.

Who this book is written for

If you are a C++ developer who wants to jump into the world of Android game development and who wants to use the power of existing C++ libraries in your existing Android Java applications, then this book is for you. You need to have basic knowledge of C or C++ including pointer manipulation, multithreading, and object-oriented programming concepts as well as some experience developing applications without using an IDE.

Read More..

Friday, February 19, 2016

socket getInetAddress return null on Android 5

Refer to last example of "Simple HTTP server running on Android", it work on Xiaomi Redmi 2 running Android 4.4.4. But somebody report program stopped on Android 5 devices. So I re-test on Nexus 7 running Android 5.1.1. Yes, the app crash! caused by NullPointerException, because socket.getInetAddress() return null.


Modify MainActivity.java to capture socket.getInetAddress() before and after close():
package com.blogspot.android_er.androidhttpserver;

import android.os.Bundle;
import android.support.v7.app.AppCompatActivity;
import android.widget.EditText;
import android.widget.TextView;

import java.io.BufferedReader;
import java.io.IOException;
import java.io.InputStreamReader;
import java.io.PrintWriter;
import java.net.InetAddress;
import java.net.NetworkInterface;
import java.net.ServerSocket;
import java.net.Socket;
import java.net.SocketException;
import java.util.Enumeration;

public class MainActivity extends AppCompatActivity {

EditText welcomeMsg;
TextView infoIp;
TextView infoMsg;
String msgLog = "";

ServerSocket httpServerSocket;

@Override
protected void onCreate(Bundle savedInstanceState) {
super.onCreate(savedInstanceState);
setContentView(R.layout.activity_main);

welcomeMsg = (EditText) findViewById(R.id.welcomemsg);
infoIp = (TextView) findViewById(R.id.infoip);
infoMsg = (TextView) findViewById(R.id.msg);

infoIp.setText(getIpAddress() + ":"
+ HttpServerThread.HttpServerPORT + " ");

HttpServerThread httpServerThread = new HttpServerThread();
httpServerThread.start();
}

@Override
protected void onDestroy() {
super.onDestroy();

if (httpServerSocket != null) {
try {
httpServerSocket.close();
} catch (IOException e) {
e.printStackTrace();
}
}
}

private String getIpAddress() {
String ip = "";
try {
Enumeration<NetworkInterface> enumNetworkInterfaces = NetworkInterface
.getNetworkInterfaces();
while (enumNetworkInterfaces.hasMoreElements()) {
NetworkInterface networkInterface = enumNetworkInterfaces
.nextElement();
Enumeration<InetAddress> enumInetAddress = networkInterface
.getInetAddresses();
while (enumInetAddress.hasMoreElements()) {
InetAddress inetAddress = enumInetAddress.nextElement();

if (inetAddress.isSiteLocalAddress()) {
ip += "SiteLocalAddress: "
+ inetAddress.getHostAddress() + " ";
}

}

}

} catch (SocketException e) {
// TODO Auto-generated catch block
e.printStackTrace();
ip += "Something Wrong! " + e.toString() + " ";
}

return ip;
}

private class HttpServerThread extends Thread {

static final int HttpServerPORT = 8888;

@Override
public void run() {
Socket socket = null;

try {
httpServerSocket = new ServerSocket(HttpServerPORT);

while(true){
socket = httpServerSocket.accept();

HttpResponseThread httpResponseThread =
new HttpResponseThread(
socket,
welcomeMsg.getText().toString());
httpResponseThread.start();
}
} catch (IOException e) {
// TODO Auto-generated catch block
e.printStackTrace();
}
}

}

private class HttpResponseThread extends Thread {

Socket socket;
String h1;

HttpResponseThread(Socket socket, String msg){
this.socket = socket;
h1 = msg;
}

@Override
public void run() {
BufferedReader is;
PrintWriter os;
String request;

try {
is = new BufferedReader(new InputStreamReader(socket.getInputStream()));
request = is.readLine();

os = new PrintWriter(socket.getOutputStream(), true);

String response =
"<html><head></head>" +
"<body>" +
"<h1>" + h1 + "</h1>" +
"</body></html>";

os.print("HTTP/1.0 200" + " ");
os.print("Content type: text/html" + " ");
os.print("Content length: " + response.length() + " ");
os.print(" ");
os.print(response + " ");
os.flush();
InetAddress clientInetAddressBeforeClose = socket.getInetAddress();
socket.close();
InetAddress clientInetAddressAfterClose = socket.getInetAddress();

msgLog += "Request: " + request + " ";

if(clientInetAddressBeforeClose == null){
msgLog += "clientInetAddressBeforeClose == null ";
}else{
msgLog += "clientInetAddressBeforeClose = " + clientInetAddressBeforeClose.toString() + " ";
}

if(clientInetAddressAfterClose == null){
msgLog += "clientInetAddressAfterClose == null ";
}else{
msgLog += "clientInetAddressAfterClose = " + clientInetAddressAfterClose.toString() + " ";
}


MainActivity.this.runOnUiThread(new Runnable() {

@Override
public void run() {

infoMsg.setText(msgLog);
}
});

} catch (IOException e) {
// TODO Auto-generated catch block
e.printStackTrace();
}

return;
}
}
}


Its found that on Xiaomi Redmi 2 running Android 4.4.4, socket.getInetAddress() keep no change before and after close().


But on Nexus 7 running Android 5.1.1, change to null after close().


So, we have to read socket.getInetAddress() before close().

Read More..

Android example to list NetworkInterface


MainActivity.java
package com.blogspot.android_er.androidscannetworkinterface;

import android.os.AsyncTask;
import android.os.Bundle;
import android.support.v7.app.AppCompatActivity;
import android.view.View;
import android.widget.ArrayAdapter;
import android.widget.Button;
import android.widget.ListView;
import android.widget.Toast;

import java.net.InetAddress;
import java.net.NetworkInterface;
import java.net.SocketException;
import java.util.ArrayList;
import java.util.Enumeration;

public class MainActivity extends AppCompatActivity {

private Button btnScan;
private ListView listViewNI;

ArrayList<String> niList;
ArrayAdapter<String> adapter;

@Override
protected void onCreate(Bundle savedInstanceState) {
super.onCreate(savedInstanceState);
setContentView(R.layout.activity_main);

btnScan = (Button)findViewById(R.id.scan);
listViewNI = (ListView)findViewById(R.id.listviewni);


niList = new ArrayList();
adapter = new ArrayAdapter<String>(this,
android.R.layout.simple_list_item_1, android.R.id.text1, niList);
listViewNI.setAdapter(adapter);

btnScan.setOnClickListener(new View.OnClickListener() {
@Override
public void onClick(View v) {
new ScanNITask().execute();
}
});
}


private class ScanNITask extends AsyncTask<Void, String, Void> {

@Override
protected void onPreExecute() {
niList.clear();
adapter.notifyDataSetInvalidated();
}

@Override
protected Void doInBackground(Void... params) {

try {
Enumeration<NetworkInterface> networkInterfaces = NetworkInterface.getNetworkInterfaces();
while (networkInterfaces.hasMoreElements()) {

NetworkInterface thisInterface = networkInterfaces.nextElement();
Enumeration<InetAddress> inetAddresses = thisInterface.getInetAddresses();
if (inetAddresses.hasMoreElements()) {
String niInfo = thisInterface.getDisplayName() + " ";

while (inetAddresses.hasMoreElements()) {
InetAddress thisAddress = inetAddresses.nextElement();
niInfo += "--- ";
niInfo += "Address: " + thisAddress.getAddress() + " ";
niInfo += "CanonicalHostName: " + thisAddress.getCanonicalHostName() + " ";
niInfo += "HostAddress: " + thisAddress.getHostAddress() + " ";
niInfo += "HostName: " + thisAddress.getHostName() + " ";
}

publishProgress(niInfo);
}


}
} catch (SocketException e) {
e.printStackTrace();
}

return null;
}

@Override
protected void onProgressUpdate(String... values) {
niList.add(values[0]);
adapter.notifyDataSetInvalidated();

}

@Override
protected void onPostExecute(Void aVoid) {
Toast.makeText(MainActivity.this, "Done", Toast.LENGTH_LONG).show();
}
}
}


activity_main.xml
<?xml version="1.0" encoding="utf-8"?>
<LinearLayout


android_layout_width="match_parent"
android_layout_height="match_parent"
android_padding="16dp"
android_orientation="vertical"
tools_context=".MainActivity">

<TextView
android_layout_width="wrap_content"
android_layout_height="wrap_content"
android_layout_gravity="center_horizontal"
android_autoLink="web"
android_text="http://android-er.blogspot.com/"
android_textStyle="bold" />

<Button
android_id="@+id/scan"
android_layout_width="match_parent"
android_layout_height="wrap_content"
android_text="Scan"/>
<ListView
android_id="@+id/listviewni"
android_layout_width="match_parent"
android_layout_height="wrap_content"/>
</LinearLayout>


Permission of "android.permission.INTERNET" is needed in AndroidManifest.xml

Read More..